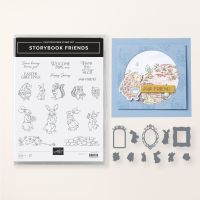
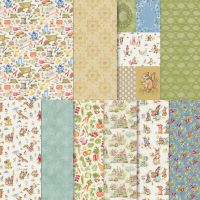
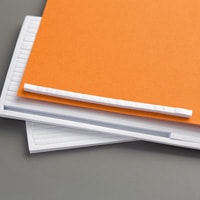
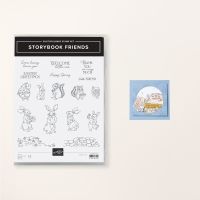
So, here's another Susan Campfield design. I have done a version of this in the past, but this is just darling with the Storybook Friends and Timeless Plaid DSP combination! So many possibilities!!


Measurements:
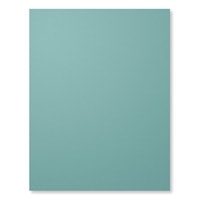
- Boho Blue:: 1/2 sheet
- Basic White: 5 " x 8" (insert), 2" square (circle for greeting); scrap (label)
- Timeless Plaid DSP (N): 4" x 5 1/4" (card front); 1 1/4" x 4 3/4" (insert panel)
- Storybook Moments DSP (N): small critter cut in a circle from DSP
To Make This Card:
- Place adhesive only on the edges of the 4" x 5 1/4" piece of Plaid DSP and adhere to the front of the folded Boho Blue card.
- Using the 3rd down from the largest circle from the Stylish Shapes Dies, cut a a circle out center of the upper portion of the card front. Because there is no adhesive in the middle, you will then get 2 die cut circles. Set this aside to be used later.
- Score the White insert piece @ 2" - 3 1/2" - 5 1/2". Crease L to R as follows: "mountain fold" on 2" score line, "mountain fold" on 3 1/2" score line, and "valley fold" on 5 1/2" score line. Crease well.
- Next, place DSP strip between the 2" and 3 1/2" score lines.
- Place adhesive on the back of the last, largest section. Accordion fold the piece together, lining up the left cut edge of the insert so it is next to the center fold of the card base, press the back to the card.
- Now, when you open the card, the right end of the insert is adhered to the inside of the card, and the left end is left lose.
- Next, place adhesive to the first scored section, but ONLY around the outside edges of this piece and not along the folded edge. Close the card and press to adhere.
- Close the card into place. Some of the DSP will be visible through the circle opening.
- Place adhesive through the circle opening and onto the exposed DSP. Adhere the cardstock (Boho Blue) piece that was cut from the card front, through the circle opening.
- Using the 4th circle die from the largest circle from the Stylish Shapes Dies and cut one of the cute critters from the DSP. Adhere the image to the Boho Blue circle with Dimensionals.
- To finish the card, die cut circle from the White square using the 4th down die. Stamp sentiment of your choice in Boho Blue ink and then mount onto DSP circle cut from front of card. Adhere to largest section of insert, across from circles on the front.
- Also, die cut banner from Stylish Shapes Dies and stamp sentiment of your choice in Boho Blue ink. Adhere to front, under circles with Dimensionals.


![Arched Wishes Cling Stamp Set (English) [ 165428 ]](https://assets1.tamsnetwork.com/images/EC042017NF/165428s.jpg "Arched Wishes Cling Stamp Set (English) [ 165428 ]")
![Timeless Plaid 6" X 6" (15.2 X 15.2 Cm) Designer Series Paper [ 164678 ]](https://assets1.tamsnetwork.com/images/EC042017NF/164678s.jpg "Timeless Plaid 6\" X 6\" (15.2 X 15.2 Cm) Designer Series Paper [ 164678 ]")
![Cajun Craze 8-1/2" X 11" Cardstock [ 119684 ]](https://assets1.tamsnetwork.com/images/EC042017NF/119684s.jpg "Cajun Craze 8-1/2\" X 11\" Cardstock [ 119684 ]")
![Basic Black 8-1/2" X 11" Cardstock [ 121045 ]](https://assets1.tamsnetwork.com/images/EC042017NF/121045s.jpg "Basic Black 8-1/2\" X 11\" Cardstock [ 121045 ]")
![Basic White 8 1/2" X 11" Cardstock [ 166780 ]](https://assets1.tamsnetwork.com/images/EC042017NF/166780s.jpg "Basic White 8 1/2\" X 11\" Cardstock [ 166780 ]")
![Tuxedo Black Memento Ink Pad [ 132708 ]](https://assets1.tamsnetwork.com/images/EC042017NF/132708s.jpg "Tuxedo Black Memento Ink Pad [ 132708 ]")
![Paper Snips [ 103579 ]](https://assets1.tamsnetwork.com/images/EC042017NF/103579s.jpg "Paper Snips [ 103579 ]")
![Stamparatus [ 146276 ]](https://assets1.tamsnetwork.com/images/EC042017NF/146276s.jpg "Stamparatus [ 146276 ]")
![Faux Glass Dots [ 164060 ]](https://assets1.tamsnetwork.com/images/EC042017NF/164060s.jpg "Faux Glass Dots [ 164060 ]")