Tuesday, January 23, 2024

Framed Flight & Airy Clean & Simple Card

 I've seen so many awesome cards using this beautiful SAB DSP, Flight & Airy! I thought this one was really unique, using my favorite frame die from the Lifetime of Love Bundle. 


Measurements:  

  • Misty Moonlight: 1/2 sheet
  • Basic White: 4" x 5 1/4" (inside), 3 1/2" x 4 3/4" (frame), scrap
  • Flight & Airy DSP (SAB) (N): 3 1/2" x 4 3/4" birds (inside frame), 1/2" x 4" (inside); 4" x 5 1/4" (Boho Blue-back side of birds)
To Make This Card:

  • Attach DSP to folded Misty Moonlight card
  • Die cut "floral oval" from basic White piece.  Remove center and pieces from leaves/flowers.
  • Using the die cut, determine which part of the "bird" DSP you would like to highlight in the center of the frame, then die cut another "floral oval" from this print.  Remove the same pieces, but KEEP the center! You will not need this "frame". (At least not for this card!)
  • Attach White "oval" to front of card with Multipurpose Glue, then add the DSP bird piece to the center of the oval, as shown.
  • Next, stamp sentiment onto scrap of White.  Die cut with smallest die from the Everyday Details Dies.  Attach to card with Dimensionals.
  • Finish with 2023-2025 InColor Dots in Boho Blue.
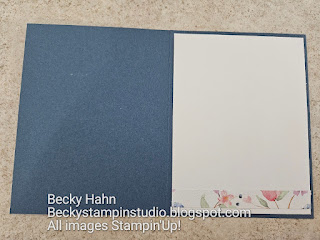
  • To complete the inside, attach White layer. Then, add a strip of DSP.

Product List

Saturday, January 20, 2024

Twisted Ribbon SAB Card

 One of my downline created this card, using all SAB or new Mini Catalog items!  I just LOVED it! It features the Twisted Ribbon Technique, that I haven't done in a while, along with the FREE, Softly Sophisticated Bundle, and new dies - Perennial Postage and Everyday Details  - the the colors...LOVE them, Pool Party and Shaded Spruce! Just gorgeous together!


Measurements:  

  • Pool Party: 1/2 sheet, 4" x 5 1/4" 
  • Shaded Spruce: 2 1/4" x 5 1/4", 3" square (punched circle)
  • Basic White: 2" x 5", 4" x 5 1/4" (inside), 3" square (circle), scrap (sentiment)
  • Sunny Days DSP (SAB) (N): 5 pcs @ 1/2" x 3 1/2" in 2 patterns, 1/2" x 5 1/4" (inside)
To Make This Card:

  • Run Pool Party quarter through Softly Sophisticated EF.  Attach to folded Pool Party card base.
  • To do the Twisted Ribbon Technique, you need to begin by making a "template". You will use the actual "base" to do this, this is the 2" White piece. These "ribbon" pieces are 1/2" wide, so you will be making 1/2" pencil "ticks" on either side of the "base".
  • I used 2 contrasting, but coordinating, colors of DSP. Begin at the upper left corner and place the first piece from the upper corner, to the first pencil "tick". The top edge of the strip will be on, or slightly below, the pencil mark. Note: I started with a tape adhesive, but I think the "green glue" works best for this! Continue until all pieces of this pattern, are on the "base".
  • You now repeat for the other side, with the other pattern. These pieces will "match" on the OUTSIDE edges.  They DO NOT form an "X"!! Again, you'll go from pencil "tick" to pencil "tick"!!  Set this aside to dry.
  • While it is drying, add the White piece to the inside, and add the DSP strip.
  • Stamp sentiment in Shaded Spruce onto scrap of White. Die cut with smallest Perennial Postage Die. Set aside.
  • Next, die cut circle in white from Everyday Details Dies. Stamp the "stems" onto the circle in Shaded Spruce ink, and line up and stamp the "flowers" in Pool Party.  Attach this circle to a Shaded Spruce circle punched with the 2 3/8" Circle Punch.
  • Your piece should be dry. Now cut around the edges so that it matches with the "base". Attach this "ribbon" piece to the Shaded Spruce layer, and then attach to card front, as shown.
  • Then, add the circle with Dimensionals, over part of the "ribbon" as shown.  
  • Also, add the sentiment with Dimensionals.
  • Finish with knot of FREE SAB Pool Party Crinkled Ribbon and FREE SAB Opaque Faceted Gems in Pool Party!  (I told you this was LOADED with FREE product!)


Product List

Friday, January 19, 2024

Clean & Simple Softly Sophisticated

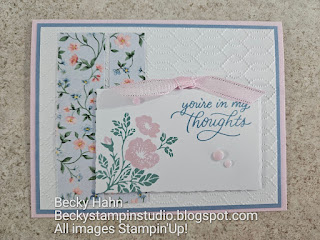
I saw this lovely card and thought that it would be PERFECT for classes!  I just love the prints and colors in the FREE, SAB Flight & Airy DSP, as well as the Softly Sophisticated SAB Bundle! This time I'm using the stamps, too!

Measurements:  

  • Bubble Bath: 1/2 sheet
  • Boho Blue: 4" x 5 1/4"
  • Basic White: 3 3/4" x 5", 2 1/2" x 4"
  • Flight & Airy (SAB) (N): 1 5/8" x 3/4", 1 5/8" x 1"
To Make This Card:

  • Attach Boho Blue layer to folded Bubble Bath card.
  • Run White layer through Softly Sophisticated EF.  Attach to card front.
  • Die cut Decked Edge Rectangle from smaller piece of White.
  • Stamp sentiment in upper right corner in Boho Blue ink.
  • Then, stamp the "greenery" in Lost Lagoon ink, in the lower left corner, as shown.
  • Finish with the "flowers" in Bubble Bath. Set aside.
  • Now, add the strips to the card front.  These are 2 different widths! Lay them out, as desired, so Deckled Label fits in where you'd like it, and adhere the strips.
  • Now, add the Label to the front of the card with Dimensionals.
  • To finish the card, tie a Bubble Bath knot and attach as shown.  I also added 3 Bubble Bath Rainbow dots from the New Mini Catalog.

Product List

Wednesday, January 17, 2024

White/Gold Lifetime of Love Oval

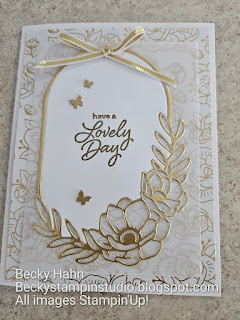
 I saw these gorgeous Lifetime of Love dies in the new Mini Catalog, and knew that I just had to have them! And, since it's time to make "love" cards, I thought now was a great time to use them! I paired the oval in Gold Foil with some of our gorgeous FREE, SAB Most Adored DSP, with the gold pattern. We will be doing this card in class next week!


Measurements:  

  • Basic White: 1/2 sheet, 3 1/2" x 4 3/4" (insert)
  • Most Adored DSP SAB (N): 4" x 5 1/4", 1/2" x 5 1/2", one, fussy cut flower
  • Gold Foil: 3 1/2" x 4 3/4"
  • Vellum: 3 1/2" x 4 3/4"
To Make This Card:

  • Attach DSP to folded White card.
  • Die cut "floral oval" from Gold Foil piece.  Remove center and pieces from leaves/flowers.
  • Die cut another "floral oval" from White.  Remove the same pieces, but KEEP the center!
  • Attach Gold "oval" to Vellum piece with Multipurpose Glue.  Add White center, too.
  • Next, emboss sentiment of your choice in Gold Embossing Powder.
  • Now, add adhesive to back of Vellum piece only where you can see the layers.  Attach to front of card.
  • FInish front with gold bow, and scattered Brass Butterflies.
  • For the inside, I adhered a strip of DSP.
  • I then found a flower on the DSP, and colored it with Blends, and then fussy cut it out! I thought this was a neat use of the DSP.  
  • I attached the flower to the inside of the card, over the decorative strip!

Product List