Wednesday, September 4, 2024

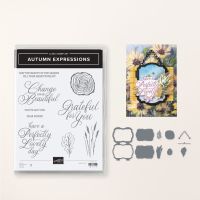
Splendid Autumn Accordion Z Fold

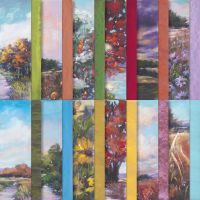
 As I was looking for additional fun folds using the Autumn Expressions Bundle and Splendid Autumn DSP, I found this awesome series of Accordion Z Folds by Tami White!  She always is so thorough with tons of ideas!! I liked this one because it used one of the scenic pieces of the DSP combined with the stamps, dies and accessories of the suite! It is really fun and easy to do. So much so, I've already done 2 more! (stay tuned).


Measurements:  

  • Blackberry Bliss: 5 1/2" x 11", 2" x 7 7/8", 
  • Very Vanilla: 3 3/4" x 5 1/4" (inside), 3" x 4" (embossed "label")
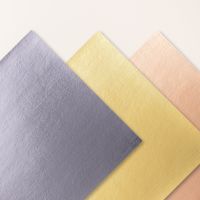
  • Textured Metallic Paper: 3" x 4" (copper)
  • Scenic Autumn DSP (N): 1 sheet of lavender daisies
To Make This Card:
  • Score Blackberry Bliss base at 1 3/4" - 3 1/2"- 5 1/4" - 7". Accordion fold and set aside.
  • Cut DSP, first, down to 5 1/4" (i.e. remove 3/4") and then cut into 4 - 1 1/2" pieces keeping the scenery in order. Attach to the accordion folds.
  • Attach the Vanilla piece to the inside. 
  • Now, for the Z fold piece.  Fold the 7 7/8" strip in half. Crease well.
  • Stamp and emboss sentiment in Copper Embossing Powder. Die cut with the label that fits the best. (one sentiment/label side is larger than the other. The die cuts 2 parts, the center, and the frame.
  • Next, die cut the same frame with Textured Copper. The inside piece will be used for the 3 die cut leaves. You can cut those, now. You will also need to trim the "tabs" from the outside of the "frame".
  • Scotch tape the insert to the frame.
  • Adhere the strip to the card with Tear n Tape. Centering on the card, and lining up to the inside fold, and outside edge. The accordion folds should be between the Z.
  • Attach one Copper leaf to lower right corner, add 2 Woven Golden leaves, too. I also added one Copper leaf to upper left corner to the sentiment label.
  • Center, and attach to Z piece.
  • To finish, I added the other Copper leaf and 2 Woven Golden leaves inside, so the don't show when the card is closed, and scattered, copper Metallic Gems.
Product List

Tuesday, September 3, 2024

Perennial Lavender Diagonal Panoramic Card

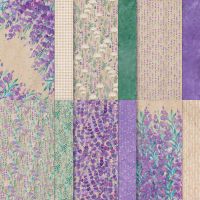
I had so much fun creating the Autumn Diagonal Panoramic Card for Stamp Club, that I just had to try another version with a 12x12 border print.  For this one, I chose the Perennial Lavender DSP.  Once figured out, the possibilities are endless!  I have so many border and scenic papers that would work with fold! Check yours out, I bet you do, too!


Measurements:  

  • Highland Heather: 1/2 sheet, 4 3/4" x 8"
  • Basic White: 4" x 5 1/4" (inside), scrap
  • 3 Color Glimmer Paper (OE): scraps (Highland Heather)
  • Perennial Lavender DSP: 4 3/4" x 7 1/2" (border print), 4" x 5 1/4" (corner print - front), 4" x 5 1/4" (solid purple print)
To Make This Card:
  • Score 4 3/4" x 8" Highland Heather cardstock every 2". 
  • Place a pencil mark 2" from the bottom on the right side of this piece.
  • Diagonally cut from upper left side to pencil mark.  Toss the top part.
  • Now, to cut the DSP for this diagonal piece.Take the larger DSP piece and make a pencil mark 1/4" from upper left edge. And, make another pencil mark UP 1 7/8" from lower right corner.  Cut diagonally between pencil marks. Set top part of DSP aside.  You will not need this.
  • Now, match and adhere these 4 pieces to the panels of the diagonal base, keeping the panoramic view intact.  This piece is done.
  • Back to the card base. Adhere the White piece to the inside.
  • Attach the purple DSP piece to other inside area.
  • Next, take the remaining Corner Border DSP piece and adhere to front of card.
  • Now, let's attach the diagonal piece to the inside!  Place Tear n Tape on the 2 outside panels of the diagonal piece. Line up the center score line with the center of the card base, leaving an 1/8" edge above layers, and adhere either end to card base.
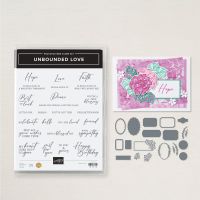
  • Let's finish this up. Die cut small scalloped label from Highland Heather Glimmer paper,  from the Unbounded Love Dies. Stamp sentiment in Highland Heather ink onto scrap of White and die cut, again, with the same label die. Attach together with scotch tape. , then add to card front with Dimensionals.
  • For the inside, stamp sentiment in Highland Heather. I added some little sprigs also cut from Highland Heather Glimmer paper.
  • Finish with Purple Fine Shimmer Gems and Brass Butterflies.
Product List

Monday, September 2, 2024

Scenic Autumn Diagonal Panoramic Card

I was needing a fold using the Splendid Autumn Suite for club this week. I had seen a few of these Diagonal Panoramic cards, and decided to give it a try with our Scenic Autumn DSP coming out soon in our Winter Mini Catalog. I just LOVE how it turned out!  It was so much fun, I tried another one with the Perennial Lavender DSP - so stay tuned!  With 6x6 scenic paper, you will need 2 sheets. 


Measurements:  

  • Crushed Curry: 1/2 sheet, 4 3/4" x 8", scrap
  • Very Vanilla: 4" x 5 1/4" (inside), scrap
  • Copper Clay: 4" x 5 1/4"
  • Scenic Autumn DSP: 2 pcs Black Eyed Susans
To Make This Card:
  • Score 4 3/4" x 8" every 2".
  • Place a pencil mark 2" from the bottom on the right side of this piece.
  • Diagonally cut from upper left side to pencil mark.  Toss the top part.
  • Now, to cut the DSP for this diagonal piece. (This is actually pretty neat use of both 6x6 pieces!) Your piece needs to measure 4 3/4" x 7 1/2". (And, the DSP is 6".) So, cut one piece 4 3/4" x 5 5/8". Take the other piece and trim off 1 7/8" from the right side. (Save the larger piece for the front of the card).
  • Temporarily attach this piece to the right end of the 5 5/8" piece, loosely matching up the pattern. Trim both ends equal with larger piece.
  • Next, make a pencil mark 1/4" from upper left edge. And, make another pencil mark UP 1 7/8" from lower right corner.  Cut diagonally between pencil marks. Set top part of DSP aside.  You will not need this.
  • And, lastly, remove the 1 7/8" piece from the far right side. Then, take the larger piece and cut into 3-1 7/8" strips.
  • Now, match and adhere these 4 pieces to the panels of the diagonal base, keeping the panoramic view intact.  This piece is done.
  • Back to the card base. Adhere the Vanilla piece to the inside.
  • Run the Copper Clay piece through the Timber 3D Embossing Folder. Adhere to other inside area.
  • Next, take the remaining Daisy DSP and trim to 4" x 5 1/4".  Run this through the Distressed 3D Embossing Folder. Adhere to front of card.
  • Now, let's attach the diagonal piece to the inside!  Place Tear n Tape on the 2 outside panels of the diagonal piece. Line up the center score line with the center of the card base, leaving an 1/8" edge above layers, and adhere either end to card base.
  • Let's finish this up. Die cut Crushed Curry label from Unbounded Love Dies. Stamp sentiment in Copper Clay onto scrap of Vanilla and die cut to corresponding layer. Attach to label base with Dimensionals, than add to card front.
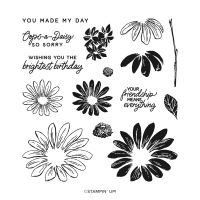
  • For the inside, stamp sentiment in Copper Clay. I added some Crushed Curry Daisies from the Cheerful Daisy stamps. I added centers with the Copper Clay Stampin' Write Marker.
  • Finish with scattered Metallic Dots on the front, and Brass Butterflies on the inside.

Product List