I'm sure many of you have certain demonstrators, or websites, that you frequent. Well, this is from one of mine, who is actually one of my downline, Robin Armbrecht of Really Robin Stamps! She has a "Playdate" most Fridays, and always has something really clever to share with TONS of ideas. I missed this one some time back. It's one of her "templates", that she calls a Tall Square Card. This is one of her ideas that she made into a shaker card! Too much fun!!! So, go give her website a try, you'll be glad you did!
Measurements:
- Night of Navy: 4 1/4" x 8 1/2", 3 1/2" x 4 3/4" (arched backing)
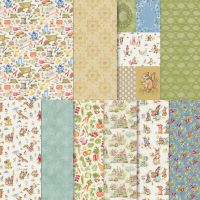
- Everyday Skies DSP (OE): 4" square (stars), 3 1/2" x 4 3/4" (sky)
- Pretty in Pink: 3 1/2" x 4 3/4" (front arch)
- Window Sheet: 3 1/2" x 4 3/4"
- Basic White: 4" square
- Fold Navy card base in half, creating a square card. Adhere "star" DSP to the front, and White square to the inside.
- Take the 8th and 5th arches and cut an arched "frame" from the Pretty in Pink cardstock. You can toss the inside pink piece.
- Stamp sentiment in Night of Navy ink onto "frame". (It just fits).
- Next, cut the "sky" and Navy backing piece from the largest (8th) arch. Adhere together.
- Glue the piece of Window sheet to the wrong side of the Pretty in Pink "frame". Let dry, and then trim. (I tried cutting it with a smaller arch, but the window sheet did not want to cut all that well).
- This is the time to stamp the "birds" in the "sky" in Night of Navy, if so desired.
- Now, take Foam Adhesive Strips and place them on the "sky" piece, all the way around, with no gaps, and about an 1/8" in. (This is great stuff as it will curve for you!!)
- Next, take a couple "pinches" of your favorite shaker elements and place inside the foam strip "bumper".
- Carefully peel off the backing on the Foam Adhesive Strips and then place "window" over them. (You can also place the Foam Adhesive Strips on the "window" arch, once it's dried, then you don't have to worry about being so careful.)
- Tada, you have a shaker card! :)
- To assemble, you will need a "template", that is really just a quarter piece of cardstock!
- Place the "base" on the bottom of the "template", then take the "arched shaker" piece and place it, face down, so that the top of the arch is at the top of the "template".
- Place adhesive on the part that is NOT extending above the card base. Flip it back over, right side up, and adhere to card front, still using the "template" as the guide, so it will fit in an A2 envelope!
- I added an iridescent bow to the outside, on the frame, and stamped a few birds in Night of Navy inside!


![Everyday Arches Bundle (English) [ 164630 ] Everyday Arches Bundle (English) [ 164630 ]](https://assets1.tamsnetwork.com/images/EC042017NF/164630s.jpg)
![Everyday Skies 6" X 6" (15.2 X 15.2 Cm) Designer Series Paper [ 164622 ] Everyday Skies 6" X 6" (15.2 X 15.2 Cm) Designer Series Paper [ 164622 ]](https://assets1.tamsnetwork.com/images/EC042017NF/164622s.jpg)
![Night Of Navy 8-1/2" X 11" Cardstock [ 100867 ] Night Of Navy 8-1/2" X 11" Cardstock [ 100867 ]](https://assets1.tamsnetwork.com/images/EC042017NF/100867s.jpg)
![Pretty In Pink 8 1/2" X 11" Cardstock [ 163793 ] Pretty In Pink 8 1/2" X 11" Cardstock [ 163793 ]](https://assets1.tamsnetwork.com/images/EC042017NF/163793s.jpg)
![Basic White 8 1/2" X 11" Cardstock [ 166780 ] Basic White 8 1/2" X 11" Cardstock [ 166780 ]](https://assets1.tamsnetwork.com/images/EC042017NF/166780s.jpg)
![Window Sheets [ 142314 ] Window Sheets [ 142314 ]](https://assets1.tamsnetwork.com/images/EC042017NF/142314s.jpg)
![Night Of Navy Classic Stampin' Pad [ 147110 ] Night Of Navy Classic Stampin' Pad [ 147110 ]](https://assets1.tamsnetwork.com/images/EC042017NF/147110s.jpg)
![Mini Glue Dots [ 103683 ] Mini Glue Dots [ 103683 ]](https://assets1.tamsnetwork.com/images/EC042017NF/103683s.jpg)
![Foam Adhesive Strips [ 141825 ] Foam Adhesive Strips [ 141825 ]](https://assets1.tamsnetwork.com/images/EC042017NF/141825s.jpg)
![Iridescent 1/2" (1.3 Cm) Striped Trim [ 163299 ] Iridescent 1/2" (1.3 Cm) Striped Trim [ 163299 ]](https://assets1.tamsnetwork.com/images/EC042017NF/163299s.jpg)
![Itty Bitty Bokeh Mix [ 164618 ] Itty Bitty Bokeh Mix [ 164618 ]](https://assets1.tamsnetwork.com/images/EC042017NF/164618s.jpg)


