Thursday, January 9, 2025

Clean & Simple Arched Bunny Frame

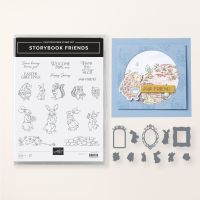
 Here is another darling Storybook Friends Clean & Simple card! This one uses a panel from the DSP sheet with the background panels, along with a die cut bunny - from the DSP, and carrot die cut from the die cut sheet!  Too Cute!  Oh, and don't forget the gorgeous arched frame!!


Measurements:   

  • Basic White1/2 sheet, scrap
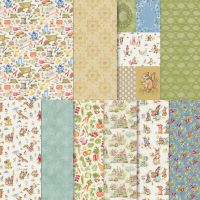
  • Storybook Moments DSP (N): crumb cake "radish" panel, bunny die cut from DSP, carrots punched out from die sheet
  • Crumb Cake: 2 1/2" x 3 3/4"
To Make This Card:

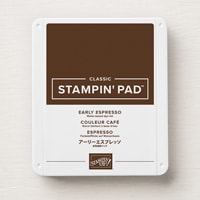
  • Cut panel from DSP sheet with decorative panels.  Lay on top of folded White card to determine placement, so you can stamp sentiment of your choice at the bottom, below the panel.  Stamp sentiment in Early Espresso or Cumb Cake ink. Then, adhere panel to card front above sentiment, and centered on the card front.
  • Die cut "arched" frame from Crumb Cake. Also cut center of frame from scrap of white. You really don't need the entire frame, unless you want to cut it for a future project.
  • Scotch tape White frame from the wrong side. Attach to the center of panel with Dimensionals.
  • Select tall animal of your choice to fit in frame, and die cut from DSP.  There might also be a die cut animal in the sheet of die cuts! Attach to frame with Dimensionals.
  • Find "carrots" on the die cut sheet. Punch out and add to card as shown.
  • Finish with scattered Antique Pearls.
Product List

Tuesday, January 7, 2025

Storybook Friends Picture

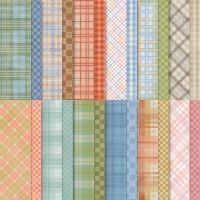
I just LOVE this Storybook Moments Suite!! And, in particular the Storybook Friends Bundle and Storybook Moments DSP - with 2 sheets of die cuts! It SO reminds me of Peter Cottontail!  Just adorable.  The next couple of posts will be quick and easy cards using this bundle, DSP, and the awesome Timeless Plaid coordinating DSP!


Measurements:   

  • Crumb Cake: 1/2 sheet cut LENGTHWISE
  • Timeless Plaid DSP (N): 4" x 6", 1/2" x 4" (Wild Wheat & Coral Plaid), 5/8" x 3 5/8" (Cajun Craze Check)
  • Wild Wheat: scrap
  • Boho Blue: 3" x 3 1/4"
  • Storybook Moments DSP (N): 1 3/4" x 2 1/4" (cottage), 2 bunnies die cut from the DSP
To Make This Card:

  • Cut Coral Plaid DSP at 3 3/8".  Adhere to top (near fold) folded Crumb Cake Card base, with plaid face up. Flip remaining piece over, so Wild Wheat check is face up. Overlap slightly over plaid piece. Adhere, and then trim off bottom. (I used the remaining to cut a 1/2" piece for the inside).
  • Center Cajun Craze check over the lapped pieces. 
  • Die cut "rectangle" frame from Boho Blue piece. Set aside.
  • Select a "cottage" image from DSP to fit in the frame opening. Hand cut to 1 3/4" x 2 1/4". Adhere to wrong side of the frame.
  • Adhere the frame to the card front with Dimensionals.
  • Next, die cut small, narrow from Stylish Shapes dies.  Stamp sentiment of your choice in Early Espresso. Attach to card front as shown.
  • Lastly, die cut 2 bunnies from the DSP, then adhere to card front with Dimensionals.  You may need to move the sentiment so the bunnies fit nicely!
  • Finish with scattered Antique Pearls.

  • Attach White layer, and Marbled Layer to folded Real Red card.
  • Die cut large, decorative circle from White square.
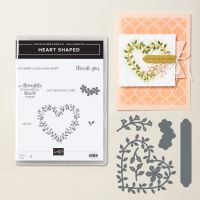
  • Stamp detailed heart from Heart Shaped stamp set in Real Red ink onto center of circle.
  • Add adhesive sheet to wrong side of Gold Foil.  Die cut with detailed heart die from Heart Shaped Dies.
  • Remove backing from die cut heart, and adhere over stamped heart.
  • Attach circle to front of card with Dimensionals.

  • Stamp sentiment onto scrap of White in Real Red ink. Die cut with included die.  Add to card front with mini-dimensionals

Product List

Real Red Marbled Heart Shaped

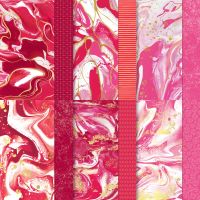
 I wanted to create a Clean & Simple card using the SAB bundle Heart Shaped along with the Red version of the Marbled Elegance DSP! I love how this one turned out! It could be used for so many occasions from Valentines, to wedding!!


Measurements:   

  • Real Red: 1/2 sheet
  • Basic White: 2 pcs @ 4" x 5 1/4", 3 3/4" square (decorative circle), scrap
  • Marbled Elegance DSP (N) (OE): 3 3/4" x 4 3/4", 1/2" x 5 1/4" (Real Red Marbled)
  • Gold Foil: 3" square
  • Adhesive Sheet: 3' square
To Make This Card:

  • Attach White layer, and Marbled Layer to folded Real Red card.
  • Die cut large, decorative circle from White square.
  • Stamp detailed heart from Heart Shaped stamp set in Real Red ink onto center of circle.
  • Add adhesive sheet to wrong side of Gold Foil.  Die cut with detailed heart die from Heart Shaped Dies.
  • Remove backing from die cut heart, and adhere over stamped heart.
  • Attach circle to front of card with Dimensionals.
  • Stamp sentiment onto scrap of White in Real Red ink. Die cut with included die.  Add to card front with mini-dimensionals
  • Attach other White layer to card inside.  Add DSP strip to inside as well.  
  • Stamp sentiment in Real Red.  Add several Brass Hearts.
  • Finish front with small, narrow Real Red bow. I added 2 gold Festive Pearls (ret) to label, and small red, rhinestones (ret) to gold heart.

Product List

Hearts of Elegance Unique Trifold Card

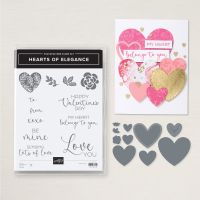
 I spotted a version of this fun fold online, and just loved it! Better yet, I hadn't seen any other samples anywhere.  The creator directed us to a video on YouTube, which I viewed, and came up with the original version using the Hearts Of Elegance Bundle in the Online Exclusives. I designed this one for my Stamp Club this month.  I had so much fun, I make 2 others!!  Which I will share with you later! You need to give this fold a try!


Measurements:   

  • Basic White: 5 1/2" x 6 1/2" (base), 3 1/2" x 10 1/2" (insert),1 3/4" x 3 1/4" (top, front layer), scrap
  • Melon Mambo: 1 7/8" x 3 3/8"
  • Marbled Elegance DSP (N) (OE): 2" x 5 1/4", 4" x 5 1/4", 2 1/4" x 3 1/4" (Mambo Marbled); 2" x 5 1/4", 3/4" x 3 1/4", 2 pcs @ 2 1/4" x 3 1/4" (Mambo fleck)
  • Gold Foil: 2 1/4" square, scrap
To Make This Card:

  • Score White "base" along 6 1/2" side at 4 1/4". Crease well, and set aside.
  • Score White "insert" at 2"-3"-5 1/2"-8". Start at the 2" end, and make a "mountain" fold, and another "mountain" fold, and then a "valley" fold, and then another "valley" fold.
  • Let's create the "base" first. Adhere the largest "marbled" piece to the inside, and the 2" marbled piece to the front.
  • On the other side of the front flap, adhere the "fleck" piece. This is not complete. Set it aside, for now.
  • On the insert piece, adhere the Melon Mambo cardstock to the top, front layer.
  • On the White, front layer, Stamp the detailed heart near the bottom in Melon Mambo ink.  Add sentiment of your choice above the stamped heart.
  • Next, add the 3/4" "fleck" strip to the narrow area
  • Then add the final "marbled" piece to the insert, skip the next panel, and then add one of the "fleck" pieces. Add the final "fleck" piece to the back side of the final panel.
  • Die cut the "stitched heart" from the Gold Foil Square, and the small, stitched heart from the Gold Foil scrap. Set aside.
  • Emboss the detailed heart in VersaMark ink and emboss in gold.  Die cut with corresponding die.
  • Adhere the 2 smaller hearts to the "inside" "fleck" piece, and the larger "heart" to the wrong, outer side.
  • Now, stamp sentiment in Melon Mambo ink onto "skipped" panel.
  • Now, we are ready to adhere the insert into the card base.
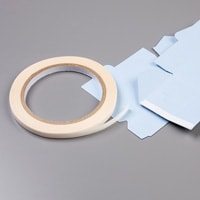
  • Place Tear n Tape on the front, narrow panel. Matching the crease with the front cut edge, adhere to the front.
  • Tri fold the rest of the insert, with the 1" panel extended, exposing the back panel (opposite your stamping).  Place Tear n Tape onto this piece. 
  • Flip the card over exposing this piece, and close the card base. 
  • And, Voila! It is done!!
  • Finish the card with new, scattered brass hearts, and a small gold bow.

Product List