Showing posts with label Countryside Inn DSP. Show all posts

Monday, October 14, 2024

Countryside Inn Corner Fold Back

Here is another card we will be doing at the Senior Center today. I ear-marked it some time ago, and am just finally getting around to doing it.  There are so many possibilities for this card, and this layout!  I loved the 2 die cut birds from the retired Flight & Airy DSP as the focal point. I think they will LOVE it!


Measurements:  

  • Boho Blue: 1/2 sheet, 2 1/4" x 3" (layer)
  • Basic White:3" square (under fold back), 4" x 5 1/4" (inside)
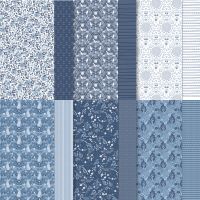
  • Countryside Inn DSP: 4" x 5 1/4" (medallion print with stripe on the back)
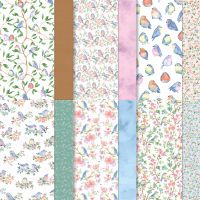
  • Flight & Airy DSP (ret): bird image. 1/2" x 5 1/4"
To Make This Card:
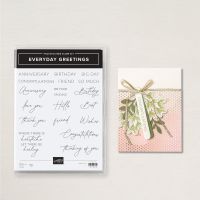
  • Select message of your choice and stamp in upper right corner of 3" White piece in Boho Blue ink. Attach to upper Right corner of folded Boho Blue base.
  • Fold back upper right corner of Countryside Inn DSP, approximately 2 1/4" (or so chosen sentiment is exposed. Check for fit/exposure, then attach to card front, lining up cut edges of White square.
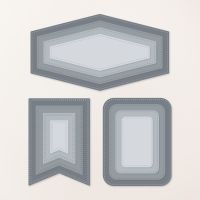
  • Die cut 2nd from largest rounded corner rectangle from Nested Essentials dies from Boho Blue piece.  
  • Select bird images of your choice and die cut with next rounded corner rectangle.
  • Adhere together, and mount, flush to card over fold back.
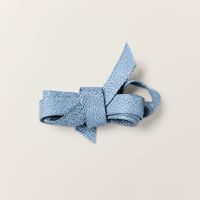
  • Attach 4" strip of Boho Ribbon to front of card.  Tie bow of same ribbon and attach over strip of ribbon with Mini Glue Dot.
  • Finish inside with White piece, and strip of DSP.
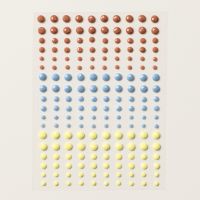
  • Finish outside with scattered Boho Blue faceted gems (ret).


Product List
Monday, October 23, 2023

Countryside Inn Fractured Card

 As I've mentioned before, I am just loving this Fractured Technique...and my customers do, too! However, I had yet to try one with FOUR different papers on the corners!!  I thought the coordinating blues in the Countryside Inn DSP would be just perfect for this card!  The center, focal point is an embossed "medallion" from the coordinating Countryside Blossoms. To complete the coordinated look, I colored some retired, white crinkled seam binding ribbon with a Boho Blue Blend.  I just LOVE it!


Measurements:  

  • Boho Blue (N)t: 1/2 sheet
  • Countryside Inn DSP: 4 - 1/4 sheets of 4 different, coordinating DSP prints
  • Night of Navy: 4 pcs @ 1/4" x 4 1/4"
  • Basic White: 2 1/2" square, 2 pcs @ 4" x 5 1/4" (1 to "build" the fractured layer)(1 inside)
To Make This Card:

  • Die cut 2" stitched square from Stylish Shapes dies from White piece.  
  • Emboss with the Countryside Blossoms Embossing Folder. I chose the center "medallion".
  • Center White, embossed square to one of the White layers. DO NOT ADHERE TO FRONT OF CARD, YET.
  • Next, take one 1/4" Night of Navy strip and lay from corner of square, along the cut edge of the square, and off the White layer. 
  • Then, lay the next strip, butting the end to the previously laid strip, and laying this one also along cut edge and off the DSP.  Repeat until all 4 layers are done.
  • Next, trim off the strips so that they are even with the DSP.
  • This is where you do things a little differently.
  • Take one of your pcs of DSP. Place "green glue" onto the White corner you are wanting to adhere it to. Slide the corner of the DSP onto the White corner, with cut edges even with the Navy borders. Flip piece over, and trim DSP even with edges of card layer.  Repeat with other 3 corners.  Laying each DSP piece in a pleasing manner (i.e. watch the lines/stripes!)
  • NOW, adhere this completed White layer to the folded Boho Blue card.
  • Finish with a bow, if you'd like.  I colored some White Crinkled Seam Binding with a Boho Blue Blend.  I also added a few 2023 InColor Dots in Boho Blue.

Product List

Friday, June 30, 2023

Darling Details Scrappy Notecard

I saw a version of this card made from scraps from other cards, and mounted on one of our smaller notecards.  I just LOVE it!!  So many possibilities! The small eyelet frame from the Darling Details Dies was cut from the left-over center piece from the large eyelet frame!  Came out so neat.  The flowers were also cut from scraps, and the background was a left over piece from a project as well.  Add a tiny sentiment and your done!  I could see a whole set of these!!


Measurements:  

  • Note Cards & Envelopes
  • Basic White: center scrap from large eyelet die, scraps for flowers, scrap for sentiment
  • Countryside Inn DSP (N):3 1/4" x 4 3/4"
To Make This Card:
  • Place DSP onto folded Note card.
  • If you don't have a scrap insert already from the large eyelet frame, cut one out so you do!  Now, cut the small eyelet frame from this "scrap", rough edges and all! Adhere to card front.
  • Next, from the insert scrap of this small frame, cut out one of the "flowers", if you angle them right you can get both! Adhere these inside "frame" with Multipurpose Glue.
  • Stamp sentiment in Boho Blue. Die cut with die from the Something Fancy Dies. You will need to trim this shorter.
  • Finish with Boho Blue gems from the new 2023 InColor Dots.
  • Note: If you happen to still have some coordinating DSP scraps, you could add some DSP to the flap of your envelope!

Product List

Thursday, June 29, 2023

Timeless Arrangements Double Decker Pop Out Card

I'm always on the lookout for easy fun folds, and spotted this one on Pinterest done by fellow demonstrator Sue Campfield. She had some awesome inspiration! This was one of them! I love the colors, the layout, the fold...just everything!  And, it was so easy to make!


Measurements:  

  • Basic White: 1/2 sheet, 2 1/4" x 3" (pop up), 2 pcs @ 1 7/8" x 5 1/4" (side panels), 3" x 4 1/2" (bottom panel), 2 3/4" x 3 3/4" (top panel), scrap
  • Night of Navy: 3" x 4", scrap 
  • Countryside Inn DSP (N): 4" x 5 1/4
  • Misty Moonlight (ret): scrap
  • Boho Blue (N): scrap
To Make This Card:
  • Fold the White base in half.  Then, fold the card front back on itself, creating a "Z" fold.
  • Attach desired DSP to back panel.
  • Take the 2 side panel pieces and emboss them (you can do this together) with the new Countryside Blossoms Embossing Folder. Attach to "Z" panels.
  • Next, we'll create the pop up mechanism. Score along the 3" side at 3/4"-1 1/2"-2 1/4". Crease well along all score lines creating a "box".
  • Now, flatten that "box" so that the 2 cut edges meet. Place Tear n Tape along the FOLDS (or the entire 3/4" piece if you prefer). Make sure the cut edges do not overlap each other, or prevent the back fold from creasing.
  • Next, place the "box" tape side down on the "inside" of the card (so half will be on top of the DSP), so that the cut edges arenalong the crease of the card. This is best done with the card laying flat/open. Adhere the Tear n Tape down well. (I got in there with my bone folder.
  • Now, to create the next panel.  Stamp the sentiment of your choice in Navy ink. 
  • Place Tear n Tape on the "top" of the "box".  Line the cut edge of this panel even with the embossed panel and centered on the card. Carefully press onto adhesive.
  • Now for the top panel. Attach the last White layer to the Night of Navy piece. Set aside.
  • Die cut the "flowerbox" from the middle stitched rectangle from the bundle dies. Cut the "largest" set of leaves from Misty Moonlight, one set from Boho Blue, and the "babiesbreath" from White.
  • Now to assemble. Tie a knot in the Boho Textured Ribbon.  Attach the knot it to the "flowerbox" with a glue dot, then wrap to the back and adhere to the wrong side.
  • Next, we'll layer the "flowers".You will build your "arrangement" either from the bottom up or top down, which ever you prefer.  
  • Place adhesive on the 1/4" base, and attach the next strip on top.  Add adhesive to the next, and add the next strip on top.  They are spaced so nicely!  Then, place adhesive on the top strip and adhere to the "flowerbox" centering the stacked strips, and placing them a little below the top edge so you don't see the edges.
  • Place Dimensionals along the bottom (to even out the thickness of the stacked strips, and adhesive on the back of the last strip.  Adhere to front White panel.
  • Stamp greeting of your choice in Night of Navy.
  • Lastly, attach 1/2 of front panel to folded back panel.
  • Finish with scattered Tinsel Gems 3-pack in Misty Moonlight.

Product List