Showing posts with label Frosted Forest. Show all posts

Friday, August 23, 2024

Frosted Forest Double Arrowhead Card

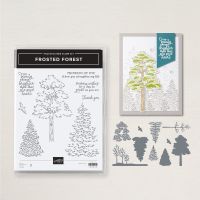
 I'm always on the lookout for easy, neat fun folds!  Sue Campfield shared this Double Arrowhead Fold, and a sample using the Frosted Forest Bundle. This time she just used the masks, without stamping the tree first, in lovely fall colors, combined with this neat fold!  It creates a nice free-standing card. I'll have to pursue this one further!  Stay tuned!


Measurements:  

  • Basic Beige (N): 1/2 sheet cut LENGTHWISE, 2 pcs @ 4 1/4" x 5" (arrowheads), 4 pcs @ 1/2" x 4", 2 pcs @ 2" x 4", 2 1/4" x 4", scrap
  • Very Vanilla: 4" x 5 1/4" (inside), 4" x 4 1/2" (tree)
  • Pecan Pie: scrap
To Make This Card:
  • We're going to make the "arrowheads" first!
  • Score both "arrowhead" pieces at 1 1/2"-3"-3 3/4"-4 1/2".
  • Crease as follows: 1st, wider section is a mtn fold, next wider section is also a mtn fold, the next, narrower, is a valley fold, and then the narrow end, is a mtn fold. Crease well.
  • Join into an "arrow" shape, by placing Tear n Tape along the crease of the last, smaller mtn fold.  Repeal for the other "arrow".
  • I would finish the inside of the card before attaching the "arrowheads" to the front. In this case, add a Vanilla piece to the inside of folded Basic Beige card. Stamp inside in Pecan Pie, now, too.
  • OK. To add the "arrowheads" to the front. The "points" will point to the center of the card, and the back "arrow" will line up with either the fold of the card or the outside cut edge.
  • Sue recommended adhering this to the card front with Multipurpose Glue, so it will give you time to slide it into place. (I used tape)
  • Now your card base is complete!
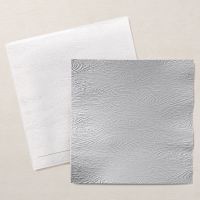
  • Take all the Basic Beige layering pieces and emboss with the new, Dashing Designs 3D Embossing Folder.
  • Adhere these pieces to the appropriate areas. (See photos)
  • Now, for the tree. I decided NOT to stamp the tree first for this one.  So, take the piece of Very Vanilla cut for the tree. Tape to worksheet. Add the "trunk" mask and tape that into place. You'll also want to mark the "V" on the mask, in order to line up the next one. Burnish the color with Pecan Pie ink and a blending brush. Remove mask #1.
  • Tape Mask #2 into place, and burnish with Crushed Curry ink. Repeat with mask #3 and Pumpkin Pie ink.
  • Die cut the tree, and add to the center area with Dimensionals.
  • Now, take scrap of Basic Beige and stamp sentiment in Pecan Pie ink. Mount onto scrap of Pecan Pie cardstock as shown. Cut to 2 1/2" and mount over tree, with Dimensionals, and between "arrows" as shown.
  • Finish with scattered Pecan Pie Gems.
Product List

Thursday, August 22, 2024

Frosted Forest Evergreen Double the Fun

 I can't get enough of these masks!! So, I decided to switch from the "deciduous" tree and try a card that used the "evergreen" tree. This is a version that uses that "double" fun fold of a bookbinding card with a "Z" fold card and the gorgeous Winter Meadow DSP! I actually stamped the full tree onto the top panel, and then die cut 2 other trees, making them shorter by trimming away some of the bottom!  Just stunning, too!


Measurements:  

  • Basic White: 1/2 sheet, , 2 3/8" x 5 1/8" (embossed top, center panel), 2 pcs @ 2 3/4" x 4"" (2 trees), 2 1/4" x 3" (inside label)
  • Pretty Peacock: 2 3/4" x 5 1/2" (center base)
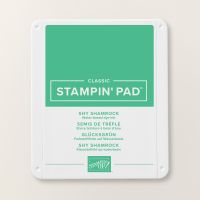
  • Shy Shamrock (N):  2 1/2" x 5 1/4" (middle base)
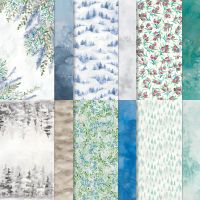
  • Winter Meadow DSP: 3/4" x 5 1/4" (left side), 3" x 5 1/4" (right side) - (print)
To Make This Card:
  • Score White front at 4 1/4" - 5 1/4" - 6 3/4". Create "book binder" fold, and "Z" fold with score lines.
  • Place Tear n Tape on the 1 1/4" area, near crease. Press together creating a Book Binding Fun Fold.
  • Place "left" DSP onto the "book binding" area.
  • Place "right" DSP onto the right, inside, as shown.
  • Place the "center" Pretty Peacock onto the "Z" lining up left cut edge, and top & bottom.
  • Attach Shy Shamrock piece on top of that.
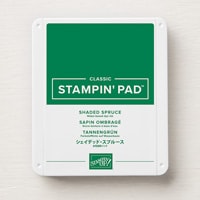
  • Now, for the evergreen trees. Stamp one tree, in black, onto the center, White panel. I centered the tree, and a little to the left. This tree also has 3 masks to color the tree. I used Shy Shamrock for the base color, or the #1 mask. For mask #2, Shaded Spruce, and Pretty Peacock ink for #3
  • To "color" the tree, tape your stamped image to scrap of paper with Washi Tape or Painters Tape. Take the mask marked #1, and line up over stamped image. Also tape this one in place so it doesn't shift. You will also want to mark the "V" placement cut from the mask onto your worksheet. Now take a Blending Brush and Shy Shamrock ink and burnish on the color.
  • Remove that mask, and go to mask #2. Line it up over the stamped tree, as well as the "V" placement mark. Use the same brush, and add color with Shaded Spruce.
  • Remove that mask, and go to mask #3. This one is optional, but I like the additional detail. Line it up, with the previous color, as well as the "V" placement mark, and add the final detail with another layer of Old Olive.  This is more subtle, or you could switch to the darker Pretty Peacock, which is what I did. Or, you could use this mask and add White Shimmer Embossing Paste!
  • Remove that mask, and voila, you have your tree! 
  • I, then, ran this piece through the Snowflake Sky 3D Embossing Folder. Adhere this to the center layers already on the card.
  • You will also need 2, additional evergreen trees.  Stamp these onto the 2 pieces of White, repeat the coloring as above.  These 2 trees will be die cut!
  • Once die cut, I trimmed away the bottom 3 layers of the tree (it's pretty defined) to make shorter trees. 
  • Add one tree to the right of the directly stamped tree, with Dimensionals. (Part of the tree will hang off), and the other tree to the left, also with Dimensionals.
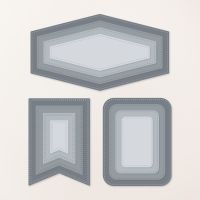
  • I die cut a rounded rectangle for the inside from the Nested Essentials dies.
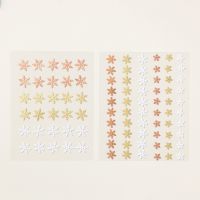
  • Finish with White Snowflakes from the Online Exclusives.

Product List

Friday, August 16, 2024

Frosted Forest Double the Fun Card

I'm still playing with the Frosted Forest bundle - i.e. masks!  I saw this design from Terri Gaines and loving this combo fold (Book Binding and Z-fold), I gave it a try! I love how it turned out!  And, so easy to do.  The masks are a lot faster to do than I thought!  I with a quick swish under the sink, I'm ready to switch colors! We WILL be doing masks, for sure, in class in the future!!


Measurements:  

  • Very Vanilla: 1/2 sheet, 2 3/4" x 5 1/2" (center base), 2 3/8" x 5 1/8" (embossed top, center panel), 2 pcs @ 3" x 4 1/2" (2 trees), 2 1/4" x 3" (inside label), scrap
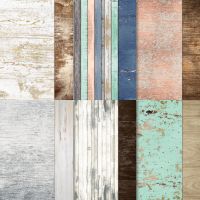
  • Country Woods DSP (N): 3/4" x 5 1/4" (left side), 3" x 5 1/4" (right side)
  • Early Espresso: 2 1/2" x 5 1/4" (middle base)
To Make This Card:
  • Score Vanilla front at 4 1/4" - 5 1/4" - 6 3/4". Create "book binder" fold, and "Z" fold with score lines.
  • Place Tear n Tape on the 1 1/4" area, near crease. Press together creating a Book Binding Fun Fold.
  • Place "left" DSP onto the "book binding" area.
  • Place "right" DSP onto the right, inside, as shown.
  • Place the "center" Vanilla onto the "Z" lining up left cut edge, and top & bottom.
  • Attach Expresso piece on top of that.
  • And, the last Vanilla piece gets embossed with the Timber 3D Embossing Folder.  Then, attach to the Early Expresso.
  • Next, you'll create the tree.  I used Early Espresso for the "trunk" mask, Old Olive for mask #2 and mask #3. These are so fun to do!  
  • First, stamp the tree (if desired, you don't have to) in Black. You will need 2 for this card. Next, take the mask marked #1, and line up over stamped image. I held both the cardstock and mask down with Painters Tape, or Washi Tape.  You will also want to mark the "V" placement cut from the mask onto your worksheet. Now take a Blending Brush and burnish in some color with Early Espresso.
  • Remove that mask, and go to mask #2 (most of the tree foliage). Line it up over the stamped tree, as well as the "V" placement mark. Use a different brush, and add color with Old Olive.
  • Remove that mask, and go to mask #3. This one is optional, but I like the additional detail. Line it up, with the previous color, as well as the "V" placement mark, and add the final detail with another layer of Old Olive.  This is more subtle, or you could switch to the darker Mossy Meadow.
  • Remove that mask, and voila, you have your tree!  
  • Now, die cut your trees, and they are ready to add.
  • I placed the first tree flush on the Z panel, and popped up the second tree with Dimensionals.
  • The front label with stamped with sentiment from bundle in Early Expresso, then cut out with "banner label" from Stylish Shapes die.  I cut off the right "flag" and tucked it under the popped up tree.
  • I die cut a rounded rectangle for the inside from the Nested Essentials dies.
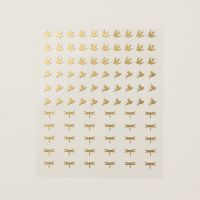
  • Finish with a brass bird from the Dragonflies and Birds from the Online Exclusives.


Product List