Friday, November 20, 2026

Welcome Noel Shadow Box Card

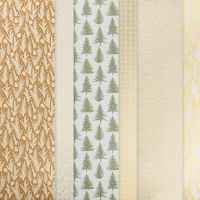
 This was my first attempt (of recent note) at a Shadow Box Card, thanks to guidance from Jacque Williams! It utilizes the new 12x12 Kraft paper (nice weight), the Neutral Noel DSP, the Welcome Noel Bundle! I love how it turned out.  It was good guidance for my own creation!


Measurements:  

  • Kraft (N) (OE): 5 1/2" x 12", scrap (house)
  • Basic Beige: 3 3/4" x 5 1/4", scrap (house)
  • Basic White: 3 1/4" x 5 1/4" (inside); 2 1/8" x 7" (landscape of trees); scraps (trees, windows)
  • Pecan Pie: scrap
  • Peaceful Pine: scraps
  • Neutral Noel DSP (N):  3 1/4" x 5 1/4" (frame) (Medallions)
To Make this Card:

  • Score Kraft Card Base @ 4" - 7 1/2" - 8" - 11 1/2". Crease well as "mountain" fold.
  • Emboss Basic Beige layer with Softly Woven Embossing Folder.  Then, adhere this to the "front".
  • Fold shadow box into shape. Adhere the "medallion" DSP onto the "top" of the "box". Making sure that your adhesive is just on the outside edges of the DSP, so that the center of the DSP is "free".
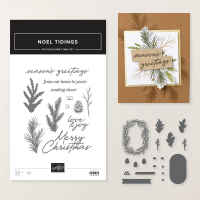
  • Die cut the "opening" through both layers with the Wide Oval Die from the Noel Tidings Dies. Remove the center pieces and keep the DSP for the front of the card.
  • Next, take the White inside layer and "burnish" Balmy Blue ink onto it with a Blending Brush, creating a "sky".  Adhere to "inside" of "box".
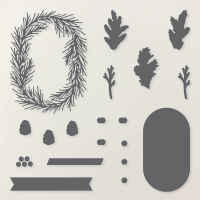
  • Now, die cut large house in Basic Beige, small house in both Kraft and Pecan Pie cardstocks. Also, die cut 2 small wreaths fromPeaceful Pine cardstock.
  • Also, die cut a strip of trees from White.
  • Next, stamp 2 large "trees" and 3 small "trees" in Peaceful Pine ink, the small deer in Pecan Pie ink. Die cut with corresponding dies.
  • Now, take a scrap of White and burnish Balmy Blue ink onto it with a Blending Brush. You'll use this for "sky" behind the "houses". Do this, now.
  • Now, to arrange the front. 
  • Use the Wide Oval from the inside "frame", and adhere it to the front as shown.
  • Next, add one large tree to the right.  Then, add the large house with Dimensionals, as well as, the Kraft small house, and small "tree".
  • Add "wreath" and "garland". Finish with Gold Bow.
  • Now, trim the "tree border" into 2 pieces. Adhere first piece to the "wrong" side of the Oval Opening, with the cut edge flush with the bottom of the "frame".
  • Then, add the second layer behind it and a little above. Attach this with Dimensionals.
  • To finish the "scene" add the Pecan Pie "house" to tree border, as well as the "deer".
  • Stamp the sentiment in Basic Black onto "sky" piece.
  • Next, we'll assemble the box.
  • Place Multipurpose Glue onto the 1/2" extension.  Lay the inside, box flat, with the 1/2" exposed, and close the front flap over it, adhering the extension to the front.
  • Now, finish the inside with the 3 "trees" that are left. Adhering them to the inside back, for dimension.  Add Gold Dot to "wreath"

Product List

Wednesday, November 18, 2026

Welcome Noel meets Graceful Evergreen Deer Shadow Box card

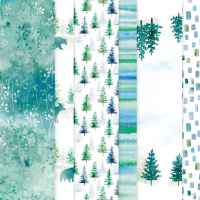
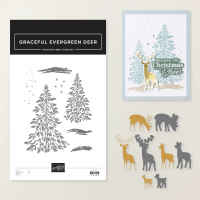
 I saw an awesome Triple Wiper Card using these products by Le Scrap de Nanou. But, I'd already done a Triple Wiper Card, and wanted to try a Shadow Box card! So, I used her inspiration of sets and colors, and created my own Shadow Box!!  I LOVE it!  It mixes and matches the die cut "houses" from the Welcome Noel Dies, paired with the Whispering Woods scenic trees DSP, and Silver OpalHot Foiled Graceful Evergreen Deer! Too fun! The houses take a little time, but the rest goes quickly!


Measurements:  

  • Pretty Peacock 2-Tone cardstock: 5 1/2" x 12"
  • Pretty Peacock: scraps
  • Lost Lagoon: scraps
  • Basic White:  3 1/4" x 5 1/4" (back), scraps (houses, trees, deer), foiled deer
  • Whispering Woods: 3 3/4" x 5 1/4" (front); 3 1/4" x 6" (inside) - Tree Border;      3 1/4" x 5 1/4" (frame) - Trees
  • Sunset Shimmer Vellum: scraps (Balmy Blue)
  • Silver Opal Foil Rolls (OE)
To Make this Card:

  • Score Pretty Peacock 2-Tone Card Base @ 4" - 7 1/2" - 8" - 11 1/2". Crease well as "mountain" fold.
  • Adhere largest "tree border" DSP piece on the "front". 
  • Fold shadow box into shape. Adhere the "trees" DSP onto the "top" of the "box". Note: In this case, onto the DARKER side. Die cut the "opening" through both layers with the Wide Oval Die from the Noel Tidings Dies.
  • Now, take the 6" border piece.  Decide which part of the border that you want showing through the opening, and trim to 5 1/4". Adhere to the inside. (onto the LIGHER side).
  • Let's finish the front, first.
  • Die cut one each of the 3 "houses" from White, Pretty Peacock, and Lost Lagoon. (You will cut these apart, and reassemble - like a puzzle!)
  • Also, stamp 2 "smaller trees" from Pretty Peacock ink. Die cut with corresponding dies.
  • Also, stamp 1 "deer" in Pecan Pie ink. And die cut this one as well.
  • Using your Paper Snips, cut "roofs" and "doors from colored "houses" and mix and match as desired.  Use mine as a guide, if desired.
  • For the "windows", I backed them with the Barely Blue vellum from the retired Sunset Shimmer Vellum using a little Multipurpose Glue. Since, that is no longer available, other options are Gold Foil, Golden Glow pearl, Burnish Vellum or White Cardstock with Balmy Blue or Golden Glow ink. I HAVE experimented with all of these!
  • Now, arrange these, as desired, on the card front.  I also felt it needed the extra trees, and little deer, but that's up to you.  There is also a larger evergreen tree you can stamp.
  • Now, for the inside!
  • To create the "shadow box", place adhesive on the 1/2" extension.  I like Multipurpose Glue, but I've used Tear n Tape, too. To make the box, lay the top of the box, flat, with the 1/2" extending, and close the front flap over it.  This is how the finished card will fit in the envelope!  Let is set a minute, and open it up! Ta da!!
  • To finish the inside, Hot Foil 3 deer in Silver Opal (isn't it GORGEOUS!). 
  • I placed the tallest one on the "outside" of the frame, so that his gorgeous antlers could be attached to the frame. And, then I added 2 more to the inside.
  • Finish the front with a sentiment stamped in Pretty Peacock, then die cut with the corresponding die, and added to the front with Mini Stampin' Dimensionals.
  • Then, add a few scattered Sparkle Sequins.
  • Also, add a few scattered Sparkle Sequins to the inside, as well.
  • I also added a White piece, stamped with 2 "smaller evergreens" to the back, so you had a place to sign!

Product List

Tuesday, November 17, 2026

Gorgeous Graceful Evergreen Deer Card

Just a "basic" Z fold card done with gorgeous products. If you need an awesome, quick, card give this one a try!  It uses the gorgeous flocked Winter Dreams from the Online Exclusives, paired with the Graceful Evergreen Deer Hot Foil Bundle. I just LOVE this. 


Measurements:  

  • Shaded Spruce: 1/2 sheet 
  • Basic White:  3 1/4" x 4 1/2" (arch), 4" x 5 1/4" (inside), scraps
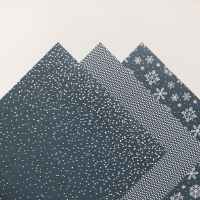
  • Winter Dreams Specialty DSP (OE): 1 7/8" x 5 1/4"
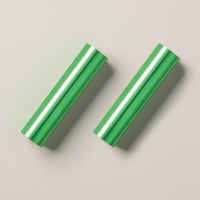
  • Green Foil Rolls (N) (OE)
  • Gold Foil Rolls (OE)
To Make this Card:

  • To create the Z fold, fold the Shaded Spruce Card base in half, and then fold it back on itself.  Crease well.
  • Next, adhere the flocked (yes, flocked) Winter Dreams snowflakes DSP to the front flap.
  • Adhere the White layer to the inside.
  • Now, die cut an arch from the Everyday Arch Dies in White.
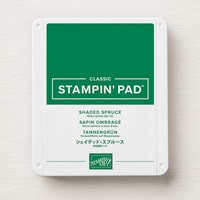
  • Stamp 2 of the smaller "evergreen trees" in Shaded Spruce ink from the Graceful Evergreen Deer stamps. Adhere the LEFT half of the arch to the front flap.
  • Next, hot foil 2 of the deer in Gold foil, and the sentiment from the Magical Christmas Hot Foil dies in Green foil.
  • Adhere 3 "deer" to the arch, as shown, and the sentiment to the top of the arch.
  • Finish the inside by stamping one small "Evergreen Tree" to the inside in Shaded Spruce ink, as shown.
  • Finish with scattered Secret Sea Snowflakes and Gold Metallic Gems.
Product List