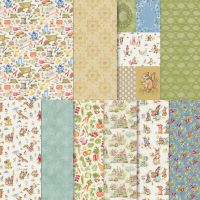
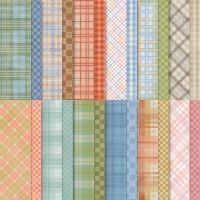
Here is the other darling idea by Verna Mullen, using this fold! Using one of my favorite, new Suites - Storybook Moments! This one also uses the plaids from the coordinating Timeless Plaids DSP, which makes for a nicely coordinated card! This one, also, makes wonderful use of the included die cuts! How fun!!
Measurements:
- Crumb Cake: 1/2 sheet
- Basic Beige: 5 pcs @ 2 1/4" x 3 1/2" (arched layers)
- Storybook Moments DSP (N): 4" x 5 1/4" front (Lost Lagoon Print); 2 1/2" x 12" center strip (Wild Wheat print)
- Timeless Plaid DSP (N): 2 pcs @ 3" x 4 1/4" medium arch (Calypso Coral Check); 3 pcs @ 3" x 4 1/4" medium arch (Crumb Cake Check)
To Make This Card:
- Adhere Lost Lagoon Print DSP piece to folded Crumb Cake card base.
- Die cut 3rd from the largest Everyday Arch die from the front, through all layers. Remove center.
- Then, take the removed piece and adhere through the created "window" to the back, inside of the card base.
- Next, take the 12" DSP strip and score at 4" - 8". Fold into thirds. (you may need to trim the ends so it lays flat.) You will want the left flap on top.
- Place Green Glue on the center section of this strip, and adhere to inside arch, centering between the fold and cut edge of the card base, and about 1/2" above bottom edge of large arch. Note: the strip for this card is DIRECTIONAL, so be sure to adhere it to the card with the pattern right side up, both inside and out!
- Now to attach the medium DSP arches!
- Die cut the 2 Calypso Coral Check and 3 Crumb Cake Check "medium" arches from the 5th from the largest Everyday Arch Dies.
- While you are at it, die cut 5 smallest arches from the 7th largest Everyday Arch Dies using the Basic Beige piece. Set these aside for now.
- Next, close the card, with the Wild Wheat strip showing through the arched window.
- Take one of the Calypso Coral arches and adhere to that strip, through the window, and centering in the arch "window". Note: I used Green Glue to slide it around. You will want to put the adhesive on the strip, and not the entire arch!
- Open the card, and adhere one of the Crumb Cake Check arches to the wrong side of the Calypso Coral one. You can add Green Glue to this entire arch.
- The key to this working, is for all of the arches to be laying on top of one another!
- Next, we'll add the arch pieces to the right flap. Open up the card, leaving the Wild Wheat folded in.
- Take last Calypso Coral arch, and line it up, right sides together, on top of the Crumb Cake arch on the other side. Using the placement of the Wild Wheat Strip as a guide, place Green Glue on this arch ONLY in the area that will touch the strip.
- Now, carefully fold the right side of the card into place catching the arch to the strip as you fold. Open, check placement. And press well. (Using green glue gives you a little time to adjust if necessary.)
- Open up the right flap, and adhere one Crumb Cake piece to the wrong side of the Calypso Coral piece.
- Now for the last medium arch. Open up strip. Place Crumb Cake piece onto the already glued piece, right sides together. Place glue on entire arch piece, then carefully fold right side into place, adhering arch to back, center.
- It's really not as difficult as it seems. If you've made cards with me in the past, you'll know that's how I line things up. If you prefer, you can just "eyeball" the placement!
- Now for the fun part...the decorating! Let's start with the front Basic Beige arch.
- I stamped the sentiment in Early Espresso ink. Select die cut to add to front. (I did pop up the front image.) Adhere to the front arch, centering in the arch. The bottom edge of the smaller arch, should match to bottom of the strip!
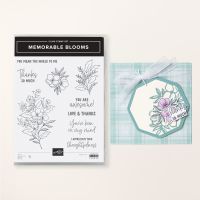
- Then, continue with the other Basic Beige arches as desired. I did stamp my "main" sentiment on the "center, inside" arch, using the stamps from the Memorable Blooms stamp set and Early Espresso ink.
- Now, pick and choose the dies that you would like to use to decorate your arches.
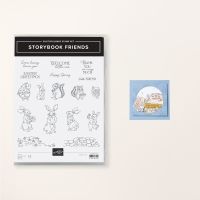
- I also added some additional sentiments with stamps from Storybook Friends stamps.
- I finished with scattered Antique Pearls.
- Note, if you'd like more room to sign/write/stamp message, you can use the back of the card..




No comments:
Post a Comment