Showing posts with label charming duck pond. Show all posts

Friday, October 17, 2025

Country Woods Charming Ducks

 This is another card I made for my Senior Center gals. It, too, uses a retired stamp set and DSP. But, once again, it helps me use up my stash!  This is an awesome masculine card, which just "fits the bill" for my gals there. This one, and she has several more "wood"/duck ideas, was designed by Terri Gaines.  Check out the others!  They're awesome, too.


Measurements:  

  • Early Espresso: 1/2 sheet
  • Country Woods (ret): 4" x 5 1/4" (lighter brown wood), 3 3/4" sq (wheat & gray grain), scraps (darker brown wood)
  • Basic White: white scrap
To Make this Card

  • Adhere Wheat & Gray square to center of folded Early Espresso card base.
  • Die cut circle "frame" from center of Lighter Brown Wood piece. Adhere outsides to card front.
  • Place foam adhesive sheet behind darker wood piece. Die cut 2 "cattails", and "duck" from sheet. 
  • Also place adhesive sheet behind darker wood piece, too. Cut out "lily pads".
  • Place adhesive sheet behind lighter wood piece, cut out "beak & wing".  This makes for a nice contrast.
  • Stamp sentiment in Early Espresso onto scrap of White.  Die cut with narrow banner die from the Stylish Shapes Dies.
  • Finish inside with White layer.  Stamp "cattails" in Early Espresso.
  • Finish outside with scattered Streaked Dots.

Product List

Tuesday, July 23, 2024

Charming Duck Pond Birthday

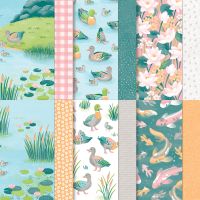
 I just love this DSP! So many possibilities!  I needed a more masculine card for my other Senior class. Since I only have 6, I could use the DSP from my 2 paper packs! Utilizing the scenic patterns and the ability to die cut some of the images (ducks) this makes for a fairly quick card. I also just love the detailed "circle frame" with these dies! I saw a similar card, and thought it was a Book Binding card.  My bad!!  This sample IS (my class is NOT) because, when you go to open it, the banner, and duck get in the way!!  Oops.  So, I just modified it to a smooth card front. Probably better for them anyway. Too much fun!


Measurements:  

  • Pretty Peacock: 1/2 sheet
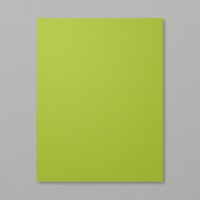
  • Granny Apple Green: 4" square, scraps
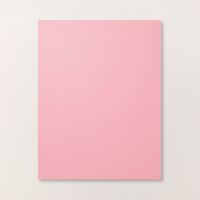
  • Pretty in Pink: scraps
  • Basic White: 4" x 5 1/4" (inside), scraps
  • Lily Pond Lane DSP(N): 1" x 4", 1/2" x 4" (lily pads), 3 3/4" square (scenic), duck
To Make This Card:
  • Run Granny Apple Green piece through "circle frame" from the Charming Duck Pond dies. Set center scrap aside to be used, later, for "lily pad".
  • Place Multipurpose Glue around circle opening (wrong side) and line up your "scenic" piece where desired.
  • Attach this piece to folded Pretty Peacock card, to the right of card front.
  • Add strip to the left.
  • Die cut "duck" from DSP. (Note: there are not many that you can use the die for) Add to card with Dimensionals.
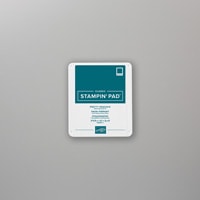
  • Stamp sentiment in Pretty Peacock ink onto scrap of White.  Die cut with Banner from Stylish Shapes dies.  Add to card as shown.
  • Die cut 1 "lily pad" from Granny Apple Green scrap, and 2 full, and 1 "lily" bud from Pretty in Pink.  Add to card front with Mini Glue Dots as shown.
  • Finish with scattered, new Dappled Dots.

Product List

Thursday, June 27, 2024

Mallards in a Frame

 I am always on the look out for suitable masculine cards! The ducks (and the cute frog) in the Charming Duck Pond bundle just fit the bill! Actually, it all does, the stamps, the dies, the DSP!!  Well, I needed a masculine card for my Senior Center gals. I wanted to use the darling frame with the cattails, and the ducks, too.  I would have liked to use some of the DSP for in the frame, but alas, there isn't enough in the pack, or 2, for 10!! So, I had to settle for stamping and coloring, with a little DSP on the inside! The top picture shows the simpler card I did for my Senior Center gals.  The picture below, shows it stepped up a bit for my class here.  Notice the addition of the DSP in the corners and the additional color on the cattails!


Measurements:  

  • Peach Pie (N): 1/2 sheet, scraps
  • Basic White: 3 3/4" x 5" (to stamp on), 4" x 5 1/4" (inside)
  • Granny Apple Green: 4" x 5 1/4"
  • Lily Pond Lane DSP (N): 1/2" x 4", 1" square (cut in diagonals)
To Make this Card

  • Die cut circle "frame" from center of Granny Apple Green piece.
  • Place White layer behind opening and determine placement of "mallard" and "duckling". Stamp in Memento Black, and color with Blends as shown.
  • Next, permanently attach White piece to frame. Shift as desired (this piece is cut a little smaller, so trim, if necessary.
  • Attach this to folded Peach Pie card.
  • Add White piece and DSP strip to the inside of card.
  • The stepped up version also adds DSP to the corners, and Peach Pie "cattail tops" to the cattails on the "frame".
  • Both cards have Peach Pie Resin Dots on the Lily Pads, triple loop Linen Thread bow, and scattered brass Dragonflies (OE).

Product List

Friday, June 21, 2024

Little Frog on a Lily Pad

I fell in love with the Lily Pond Lane suite the moment I saw it.  The colors are so fun and, the ducks are so cute, but the little frog on the lily pad, is just adorable! I haven't seen much done with just the frog, except for this one, which I knew I had to try. Stay tuned for more ideas with this suite, especially the darling circle frame with the cattails!


Measurements:  

  • Pretty in Pink (N) 1/2 sheet
  • Basic White: 4" x 5 1/:4" (inside), 3 1/8" x 4 3/8"
  • Peach Pie (N): 3 3/8" x 4 5/8"
  • Granny Apple Green: 5/8" x 3 1/8"
  • Lily Pond Lane DSP (N): 1 3/8" x 3 1/8" (peach stripe), 1/2" x 5 1/4" (multicolor cattails)
To Make This Card:
  • Mount Peach Pie piece to folded Pretty in Pink card.
  • Lay Peach Pie DSP onto White layer, where desired. Mark top with pencil.
  • Remove DSP and stamp one "cattail stems" on each side. Then stamp "cattails" in Pretty in Pink.
  • Stamp little frog in between. Color "lily pad" in lt Granny Apple Green, and "frog" in Dk Granny Apple Green.  You can also add some green color to the "stems".
  • Now, permanently attach DSP to White piece.
  • Heat emboss sentiment in White onto Granny Apple Strip. Attach to card on top of DSP.
  • Now you can attach this White piece to Peach Pie piece.
  • On the inside, attach White layer and cute strip of "cattails".
  • Finish the outside with scattered brass "dragonflies".

Product List