Showing posts with label hot foil. Show all posts

Monday, August 24, 2026

Two Folds in One Foiled Lustrous Leaves

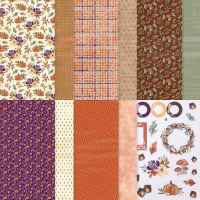
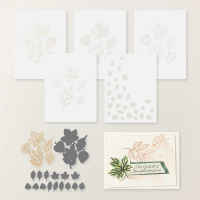
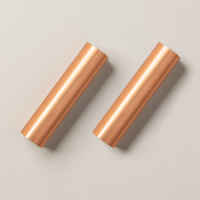
 I just LOVE Karen Titus' new fun fold! So, I created a fall one, with new products, for an event I am attending this coming weekend!  We get to attend a shoebox swap and of course, there is swapping! This card uses our soon-to-be-released Copper Foil with the Lustrous Leaves Bundle!  I also used some gorgeous fall DSP from the September OnLine Exclusives - Autumn Oppulence!


Measurements:  

  • Crumb Cake : 1/2 sheet
  • Autumn Oppulence (N) (OE): 1 1/4" x 4" (Cajun Craze sm print), 3 3/4" x 4" (Early Espresso & Mushroom print), 3 1/4" square (Basic Beige print - inside card)
  • Cajun Craze 2-Tone Cardstock: 1/4 sheet (Foiled Leaves), scraps
  • Very Vanilla: 3 1/2" x 7", scrap
  • Basic Beige: 2 3/4" square (foiled leaf), 1/4 sheet - reverse foil the leaves
  • Copper Hot Foil
To Make this Card:

  • Fold Crumb Cake card base in half.  Open up and cut front flap at 1 1/2" from left side from cut edge to crease of card base.
  • Adhere this 1 1/2" piece to the card front.
  • Next, add the DSP to the corresponding areas on the front of card.
  • Now, fold the "inside card" in half. With the fold at the bottom, adhere the piece of DSP 
  • I stamped a sentiment from the Phrases & Frames stamp set in Cajun Craze ink onto a scrap of Very Vanilla.  Then, die cut with a rectangle from the Nested Essentials dies.
  • I added a reverse foiled leaf underneath, and used Cajun Craze dots from the Painted Patch Dots.
  • Open up the card and stamp your desired sentiment in Cajun Craze ink. I also added two small die cut leaves from the 2-tone card stock. (One each shade!).
  • Next, add this "card" to the inside of the card.  The inside is finished.
  • Now to complete the front of the card!
  • Wrap 13" of ribbon around the attached area.
  • Heat foil the Lustrous Leaves in Copper Foil using both sides of the Cajun Craze 2-tone cardstock, as well as the piece of Basic Beige.
  • Then, die cut with corresponding die.
  • I also "reverse" foiled the leaves onto Basic Beige, and cut these out as well.  One of the smaller leaves gets tucked under the sentiment of the inside card.
  • Arrange 3 large leaves on the card front.  I also added a couple die cut, smaller leaves.to the upper corner.
  • If desired, I added several Basic Beige Natural Dots to the front.


Product List
Monday, August 3, 2026

Framed Violet and Foiled Swiss Dots

 I saw a similar sample using the Impressions dies along with the Framed Violets dies. Of course, I added my own twist and added  gold foiled Swiss Dots on Secret Sea cardstock and the Shimmering Stripes DSP for the center of the label. This is actually a really clean & simple card!


Measurements:  

  • Gorgeous Grape: 1/2 sheet cut LENGTHWISE, 1/2" x 3 7/8" strip, 2" x 3" (label), scrap
  • Peaceful Pine (N): 4 1/8" x 5 3/8", scraps
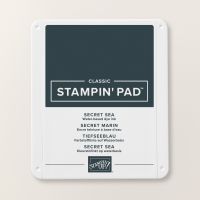
  • Secret Sea: 3 7/8" x 5 1/4"
  • Fresh Freesia: scraps
  • Basic White: 4" x 5 1/4" (inside)
  • Violet Dreams (N)(OE): 2 1/2" x 3 7/8" (Secret Sea print)
  • Shimmering Stripes DSP(N) (OE): 2" x 3" (inside label)
To Make this Card:

  • Add Peaceful Pine layer to folded Gorgeous Grape card base.
  • Hot foil Secret Sea layer in Gold Foil with Swiss Dots die. Adhere to front of card.
  • Also, add Violet DSP to the top of the card.
  • Adhere the Grape strip to the front, over the "seam".
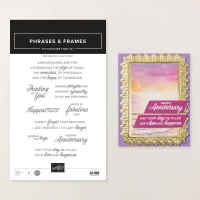
  • Die cut label from Phrases & Frames Impressions die.  Then, go back and run it through, again, with the Impressions mat.
  • Add to front of card, over Grape strip, with Dimensionals.
  • Die cut center oval from Shimmering Stripes DSP.  Stamp with sentiment of your choice in Secret Sea Ink. Blot ink. Then, add to center of "label" with Dimensionals.
  • Next, die cut flowers in Gorgeous Grape and Fresh Freesia. Die cut all 3 leaves in Peaceful Pine.
  • Arrange die cuts onto front of card as shown.
  • Embellish flowers with Adhesive-Backed Blooms. I also added a small Freesia bow.
  • Finish the inside with layer of White. Add die cut leaves and flowers as desired.  Center of flower was a Basic Rhinestone.

Product List

Friday, July 31, 2026

Botanical Glow/Valley in Bloom Pop Out Slider Card

 This is the original card that I saw using the Pop Out Slider Fold. It is just stunning IRL! This one was created by Sue Erikson, the Soggy Stamper. It combines the gorgeous, new Botanical Glow Hot Foil Bundle, with the Valley in Bloom DSP (yes, I am STILL using this Suite!). It also uses the Classic Greetings Hot Foil Dies and Gilded Wings Accents. We may just have to do this one in my Monthly Class!!


Measurements:  

  • Lost Lagoon: 1/2 sheet (front), 5 1/2" x 6 1/2" (inside), 3 1/4" x 5 1/2" (back), 2 pcs @ 2" x 3"
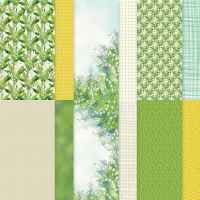
  • Valley in Bloom DSP: 1 3/4" x 5 1/4" (Corner/border piece), 3 1/2" x 5 1/4" (Corner image) 
  • Pretty Peacock: 2 3/8" x 5 1/4"
  • Lost Lagoon 2-Tone Paper: 3/4" x 12"
  • Basic White: 2 pcs @ 1 3/4" x 2 3/4", 2 1/2" x 5 1/4" (inside), 2 3/4" x 3 3/4" (sentiment)
  • Gold Foil: 1/4" x 5 1/4"
To Make this Card:

  • Score the "front" piece along the 11" side @ 4 1/4" - 5 1/2". Rotate to the shorter side and make the following cuts/slits, to the 5 1/2" score line: 1/2" - 2 1/2" - 3" - 5".
  • Next, remove the 1/2" pieces from top, bottom and center, leaving 2 extensions.
  • Take the inside piece and score along the 6 1/2" side @ 2 3/4". Crease well.
  • Adhere the larger, border DSP piece to the left side, and the White piece to the smaller, right side.
  • Next, adhere the left cut edge of the inside piece, to the inside cut edge of the front.  I used Multipurpose Glue and only placed glue for about 1" wide. You want the area near the creases free.
  • Now, we need to create the "guide" for the moving "extensions".
  • Wrap the 12" 2-tone piece around the inside, back of card, for fit.  Adhere.
  • Remove this from its' current position, and slip it over the "extensions of the outside piece, and adhere to to just the back of the inside piece. Clear as mud, right.  It DOES work!
  • The final step is to adhere this strip to the outside piece, placing Multipurpose Glue just on the 3/4" 2-tone strip. Lining up the cut edges.
  • As you flip over your base, you'll see the whole mechanism exposed.  That's where to add the last piece of base color. Again, just add Multipurpose Glue to just the exposed 3/4" strip.
  • Try the mechanism, to see that it "works"! The more you move it, the easier it will move.
  • Let's work on the front.
  • Stamp the image from the Botanical Glow Bundle in Pretty Peacock ink onto the Pretty Peacock piece. Then, foil the corresponding die in Gold Foil.
  • Adhere this piece to the left side of the "front".
  • Add the Gold Foil strip over the "seam" where the 2 pieces meet.
  • Next, foil the sentiment of your choice, and die cut.
  • Finish the front with Gold Low Profile Dots.
  • For the inside, stamp sentiment of your choice in Pretty Peacock ink onto one of the White layers.  Adhere to one of the Lost Lagoon layers.
  • Adhere the other White Layer to the last Lost Lagoon piece.
  • Adhere to the corresponding "extensions" using Multipurpose Glue, just on the outside edges.
  • Try the mechanism, again!
  • Finish the inside with Gilded Wings Accents.

Product List