Showing posts with label thoughtful journey. Show all posts

Wednesday, August 28, 2024

In the Grove meets Thoughtful Journey

 One can't have too many "tree" dies!  This one is another gorgeous die that creates a horizontal, rectangle opening of BIRCH trees! (Each die has it's own "tree" and orientation!). I love the rounded corners and graceful bottom edge on this one. These always work so well with our scenic papers and make awesome guy cards!  I usually don't like to mess with the design with a sentiment, but this one is...okay. I love the extra design of this card, which adds an additional, smaller card inside with the embossed DSP.  So many of our DSP's would work for this design!  Give it a try!


Measurements:  

  • Thick Basic White: 1/2 sheet cut LENGTHWISE
  • Basic White: 5" x 7 1/2" (inside card)
  • Boho Blue: scrap
  • Thoughtful Journey DSP (N): 3 3/4" x 5", 1/2" x 5" strip
To Make This Card:
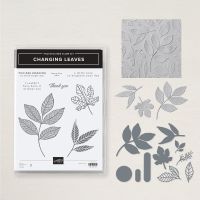
  • Fold Thick, White card base in half.  Center and die cut the Birch trees. I also cut the White "tag" from the Changing Leaves Dies from the area between the trees. (It really doesn't need to be thick, but, hey, it works!)
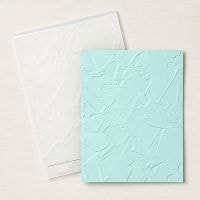
  • Run DSP piece through the Painted Texture 3D Embossing Folder, now found in the Online Exclusives.
  • Adhere this piece to the folded inside card. The cut edges will be flush with the card.
  • Next, attach this card to the inside of the card base. I added a strip of DSP to the inside, flush with the inside bottom of this card.
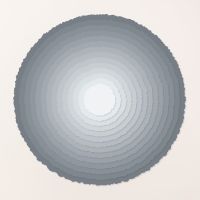
  • For the tag, stamp sentiment of your choice onto the White circle in Boho Blue ink.  Attach this to the 3rd smallest Deckled Circle Die, also now found in the Online Exclusives, cut in Boho Blue cardstock.
  • Add to card front with Multipurpose Glue.
  • Finish card with scattered Dragonflies and Birds, from the Online Exclusives.
Product List

Monday, July 15, 2024

Thoughtful Journey Puzzle Slider Card

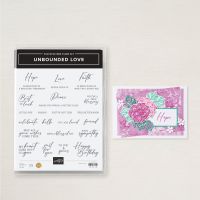
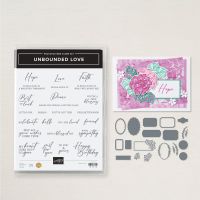
 I saw this interesting fold using any gorgeous designer paper! It's so clever and really easy to do! I was wanting to try both the fold, and the gorgeous Thoughtful Journey DSP, so I just combined the 2.  Add a layered Unbounded Love label, and it's really stunning! We will be doing this card in class this week!


Measurements:  

  • Petunia Pop (N): 4 1/4" x 9 1/2", 2 pcs @ 2 1/8" x 2 1/4", 2 pcs @ 2 1/8" x 3 1/4", scrap
  • Basic White: 4" x 5 1/4", scrap
  • Thoughtful Journey (N): 3 3/4" x 5" (one with a thistle), 2 pcs @ 1/2" x 5 1/4"
To Make This Card:
  • Score card base at 1" - 2" - 7 1/2" - 8 1/2" (or 1" & 2" from each end) Accordion fold each end well. Set aside.
  • Take DSP for the front, and cut as follows.  The idea is to keep the pattern matched AFTER you cut it apart, hence the "puzzle" aspect of this card. 
  • First, cut the DSP piece in half lengthwise at 1 7/8". Take the TOP strip and cut a 3" piece, which leaves 2".  Lay that out as it was, on the table.
  • Take the BOTTOM strip and reverse the measurements. Cut a 2" strip FIRST, which leaves a 3" piece. Lay this out with the other 2 pieces, which will reassemble the whole piece
  • Next, lay out the Petunia Pop layering pieces. These ARE all rectangles, so make sure you have the smaller pieces laid out correctly.  You can double check them with the DSP pieces.  They only fit one way.
  • Adhere the DSP pieces to the corresponding Petunia Pop layer. I took mine one at a time and placed them back in place on my table.
  • Let's finish the inside next. Add the White Base to the inside. I cut the strips from the remaining scraps of the DSP. Place them where desired.  I stamped my sentiment in Petunia Pop, now.
  • Now, back to the front of the "base". Add Tear n Tape to the top 1" on each side. 
  • Starting with the upper left "puzzle piece", add to 1" piece, matching upper corner, top and sides of the flap.
  • Repeat with the lower left "puzzle piece", and then go to the other side and finish. The pieces might overlap slightly, that is not a problem!
  • For the outside "label", Cut the larger scalloped oval in White.  The inner Oval is a "window", die cut it from Petunia Pop.
  • Layer together.  I used Multipurpose Glue for this.  Then, I can slide the piece around and into place.
  • Stamp sentiment of your choice in Petunia Pop.
  • Carefully add to card front with Dimensionals. (I also used a small, clear velcro dot to the opposite side to help keep it closed.  This is on a Dimensional, too!
  • Finish with a bow of Petunia Pop ribbon, and scattered Iridescent Gems.

Product List