Showing posts with label sentimental christmas DSP. Show all posts

Wednesday, October 9, 2024

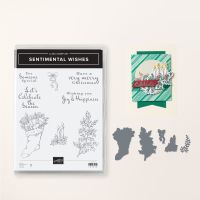
Sentimental Wishes Accordion Fold Card

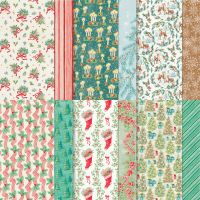
I saw this awesome card made by Mary Deatherage using the gorgeous Sentimental Christmas DSP, and knew I had to give it a try!  I love the extra images on the accordion folds. This really is much easier than you think. I can't wait to find, or create, another one! 


Measurements:  

  • Shaded Spruce: 1/2 sheet, 1 1/4" x 4" (label)
  • Basic Beige: 2 5/8" x 5 1/8" (front), 3" largest stitched circle, 2" strip for 3 smaller stitched circles,  2 pcs @ 2" x 3" (holly), scrap for "candles"
  • Pretty Peacock: scraps
  • Sentimental Christmas DSP (N): 5 1/4" x 10" (candy cane border), 2 3/8" x 4 7/8" (Shaded Spruce stripe),1 stocking die cut, 1 holly berry bouquet die cut
To Make This Card:
  • Fold Shaded Spruce card in half.
  • Next, take the "Candy Cane" DSP and score carefully at 2" - 3" - 4" - 5" - 6" - 7" - 8".
  • Make an accordion starting with a "valley" fold, set aside.
  • Let's work on the card front.
  • Mount the Shaded Spruce Stripe to the Basic Beige layer. Attach to left side of card front, as shown.
  • Die cut Basic Beige circle from the 2nd to the larges Stylish Shapes Dies.
  • Stamp 2 "holly sprigs" in Memento Black onto the 2" x 3" pieces.  Color with Blends as shown, then die cut with corresponding die.
  • Die cut 3 "sprigs" from Pretty Peacock.
  • Emboss sentiment in White, and die cut with largest banner die in the Stylish Shapes Dies.
  • Now, to arrange it all.
  • Attach the circle to the front of card. Add one "holly sprig". Tuck the Peacock Sprigs where desired. Add the other "holly sprig" with Dimensionals.
  • Lastly adhere the "banner", as shown, also with Dimensionals.
  • Next, let's work on the inside.
  • Take the accordion piece, and stamp sentiment onto far right, last panel in Black Ink.
  • Now, place adhesive (or glue - mine made a mess) onto the outside 2" areas. Adhere to inside of card as shown.
  • Now for the additional pieces
  • Die cut 3 small stitched circles.
  • Die cut one "stocking" from the DSP, fussy cut one "holly bouquet" from the DSP, and stamp and color the candles onto a scrap of Basic Beige.
  • Adhere all images to a circle with Dimensionals.
  • Now, let's add them to the card.  
  • The first circle, with the "holly bouquet", got on the front, top accordion.
  • Then, I added the "candles", to the bottom, back accordion.
  • And, lastly I added the "stocking" centered in between the other 2.
  • To finish, I scattered a few, new, silver Drusy Gems.
Product List

Tuesday, October 8, 2024

Clean & Simple Sentimental Christmas Deer

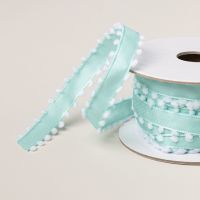
 My hostess this month selected the Sentimental Christmas Suite. She sent me a version of this card, which is really adorable. But, the bow was our neat, new Pool Party Pom Pom ribbon, which is currently on back order, so I substituted with some wider Pool Party ribbon I had on hand.  I still think it turned out just as nice! The paper has such a vintage feel.  Grab a favorite die, and cut out the images if there isn't a coordinating one for the image you want!


Measurements:  

  • Pool Party: 1/2 sheet cut LENGTHWISE
  • Basic White:4" x 5 1/4" (inside) 
  • Shaded Spruce: 2 1/2" x 5 1/2"
  • Sentimental Christmas DSP (N): 1 - single deer image
  • Winter Meadow DSP: 2 1/4" x 5 1/2". 1/2" x 5 1/4"
To Make This Card:
  • Run front of folded Pool Party card through Snowflake Sky 3D Embossing Folder.
  • Adhere DSP to Shaded Spruce layer, and then attach to card front.
  • Die cut one of the deer from the DSP using a shape die of your choice. I used one from the retired Thoughtful Expressions Dies.
  • Stamp sentiment in Shaded Spruce ink onto bottom of DSP layer.
  • Next, add die cut "deer" to the front, above the words, with Dimensionals.
  • Finish inside with piece of White and strip of DSP.
  • FInish the outside with a Pool Party bow, and scattered, silver Drusy gems.

Product List

Monday, October 7, 2024

Sentimental Wishes Spanner Card

I hadn't done one of these folds in a LONG time, so when I saw a sample using the Sentiment Christmas DSP, I had to give it a try! I really like how it turned out!


Measurements:   

  • Basic Beige: 1/2 sheet cut LENGTHWISE, 1" x 4 1/4" (bridge)
  • Shaded Spruce: 7/8" x 4 1/8" (bridge), 2 1/8" x 5 3/8", 2 pcs @ 7/8" x 5 3/8"
  • Basic White: 2 1/4" x 5 3/8", scrap
  • Sentimental Christmas DSP (N): 2 pcs @ 1" x 5 3/8"(inside), 2 pcs @ 3/4" x 5 3/8" (front) (Shaded Spruce Stripe)
To Make This Card:

  • Fold Basic Beige card in half.  Crease well.  Now, cut from cut edge to fold 1" on each side. 
  • Attach narrow Shaded Spruce strips to outside edges, then add narrower DSP strips.
  • Run larger Shaded Spruce piece through Embossing Folder of your choice. I used the Exposed Brick.
  • Attach this to the center section.
  • Attach smaller Shaded Spruce piece to the Basic Beige "bridge".
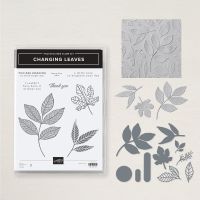
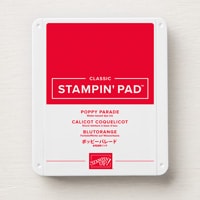
  • Ink up the bottom portion of the sentiment from the Sentimental Wishes stamps with Poppy Parade ink. Stamp onto scrap of White and die cut with long die from the Changing Leaves Dies.
  • Add to front of card. Adhering only the areas that will touch the outside sides. Voila you have your Bridge Span.
  • For the inside of your card, first adhere the White piece, then attach the wider DSP pieces so they butt up to the White piece as shown.
  • Die cut (or stamp) a bow, and then stamp sentiment inside with Shaded Spruce ink.
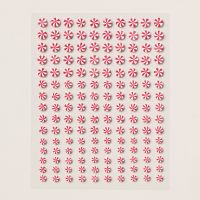
  • Finish the outside with a die cut "Stocking" from the DSP, attached with Dimensionals, and scattered Peppermints!

Product List

Saturday, October 5, 2024

Layered Deer

There are so many things that I love about this card!  Love the colors working together, obviously love the DSP, love the new Forever Plaid Embossing Folder, as well as the Spotlight on Nature dies, and I love the little deer!!


Measurements:  

  • Crumb Cake: 1/2 sheet, 4" x 5 1/4", 3 5/8" (decorative circle)
  • Basic White:4" x 5 1/4" (inside) 
  • Lost Lagoon: 3" square (radiating circle)
  • Sentimental Christmas DSP (N): 2 3/4" x 4 1/2", 1/2" x 5 1/4" (trees), 2 deer cut inside a circle
To Make this Card
  • Run Crumb Cake layer through new Forever Plaid Embossing Folder. Attach to folded Crumb Cake card.
  • Adhere tree DSP to card front, at an angle, as shown.
  • Die cut 3 1/4" decorative circle from the Spotlight on Nature dies from Crumb Cake square. 2 3/4" radiating circle from Lost Lagoon square, and select 2 deer w/ trees to cut from 2 1/2" stitched circle from the Stylish Shapes dies.
  • Attach all together and adhere to card front with Dimensionals.
  • Complete inside with Basic White layer, and strip of DSP.
  • Finish the outside with a narrow bow of Shaded Spruce Ribbon and Scattered Gems from the 3-pack Tinsel Gems.
Product List