Showing posts with label unbounded beauty DSP. Show all posts

Tuesday, March 18, 2025

Extended Pop Up Cross

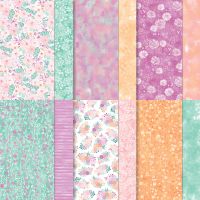
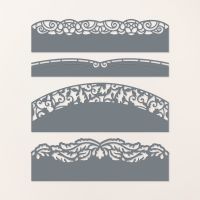
 I just love the "original" version of this Pop Up Cross card, which, admittedly, is a little small, when I found this full-size version, with the decorative border on the side! So, I went through my DSP and came up with this Spring version using the Unbounded Beauty DSP in the Annual Catalog, along with the recently retired Elegant Borders in the Online Store. It is really pretty when there is nice contrast between the border and the back piece. Just a few of the measurements change to create the back piece from the original.  Enjoy!


Measurements:  

  • Petunia Pop: 1/4 sheet, scrap
  • Pretty in Pink:3 3/8" x 5 3/8"
  • Basic White: 5" x 5 1/4" (pop up base), 1 1/4" x 3 1/8" (cross),4 1/4" x 5 3/8" (border piece)
  • Unbounded Beauty DSP: 1 1/8"" x 5" (cross support), 1 1/8" x 3" (cross), , 2 pcs @ 3/4" x 5" ( pop up sides) (white floral), 2 pcs @ 3/4" x 5" (outside pieces) (Petunia Pop floral)
To Make This Card:

  • Score White Pop Up Base along 5" side at 1"- 1 7/8" - 3 1/8" - 4". Crease as shown - valley, mountain, mountain, valley. Crease well.
  • Match up DSP pieces to corresponding sides of pop up base and cross piece. Adhere to cross. Set aside.
  • Next, take a decorative border of your choice, and die cut the long edge of the White base.  Lay this piece onto the Petunia Pop solid color base. Trim this piece so that you have about a 1/16" edge (really narrow)  all the way around - mostly from the left edge. Adhere to colored base.
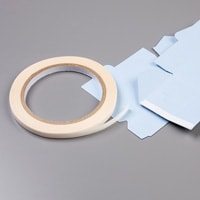
  • Now, place tear in tape on wrong side of the outside pieces. Remove backing. Smash flat (like you will put in an envelope, so it kind of rests to the side), and center over Pretty in Pink Pop Up base and adhere.
  • Next, add cross piece.
  • To finish, check borders of Pop Up cross to the bordered layer.  Trim where necessary.  Most layers are really narrow, i.e. 1/16". If you like what you see, adhere to card base.
  • To finish, cut a small Petunia Pop circle from the Spotlight on Nature dies.
  • Stamp a sentiment onto a scrap of White in Petunia Pop ink, and cut with smallest circle from the Stylish Shapes. Mount onto Petunia Pop circle, and add to cross.
Product List

Thursday, July 25, 2024

Unbounded Beauty Puzzle Slider Card

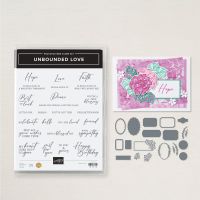
This is one of Sue Campfield's original ideas for her Puzzle Slider Card. It utilizes the Unbounded Beauty DSP and Unbounded Love Bundle.  I added my own twist with a few Glimmer paper accents. So pretty and so easy to do!


Measurements:  

  • Basic White: 4 1/4" x 9 1/2", 2 pcs @ 2 1/8" x 2 1/4", 2 pcs @ 2 1/8" x 3 1/4", scrap
  • Unbounded Beauty (N): 3 3/4" x 5" (Berry Burst print)(front), 4" x 5 1/4" (stripe)
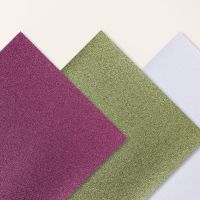
  • Berry Burst Glimmer Paper (OE): scraps
To Make This Card:
  • Score card base at 1" - 2" - 7 1/2" - 8 1/2" (or 1" & 2" from each end) Accordion fold each end well. Set aside.
  • Take DSP for the front, and cut as follows.  The idea is to keep the pattern matched AFTER you cut it apart, hence the "puzzle" aspect of this card. 
  • First, cut the DSP piece in half lengthwise at 1 7/8". Take the TOP strip and cut a 3" piece, which leaves 2".  Lay that out as it was, on the table.
  • Take the BOTTOM strip and reverse the measurements. Cut a 2" strip FIRST, which leaves a 3" piece. Lay this out with the other 2 pieces, which will reassemble the whole piece
  • Next, lay out the White layering pieces. These ARE all rectangles, so make sure you have the smaller pieces laid out correctly.  You can double check them with the DSP pieces.  They only fit one way.
  • Adhere the DSP pieces to the corresponding White layer. I took mine one at a time and placed them back in place on my table.
  • Let's finish the inside next. Add the Berry Burst Stripe to the inside. Stamp sentiment in Berry Burst ink onto piece of White and die cut with scallop oval die from the Unbounded Love Dies. Attach to inside of card.
  • Now, back to the front of the "base". Add Tear n Tape to the top 1" on each side. 
  • Starting with the upper left "puzzle piece", add to 1" piece, matching upper corner, top and sides of the flap.
  • Repeat with the lower left "puzzle piece", and then go to the other side and finish. The pieces might overlap slightly, that is not a problem!
  • For the outside "labels", Stamp sentiment onto scrap of White. Die cut with label die, as shown.  Also, cut same die from Berry Burst Glimmer paper. Cut in half and mount behind label.
  • Also die cut detailed "leaves" from scraps of Berry Burst Glimmer paper. 
  • Add single leaf to inside, tucked under oval.
  • Attach double leaves to back of labels. and attach all to the front panel, as shown, with Mini Dimensionals.
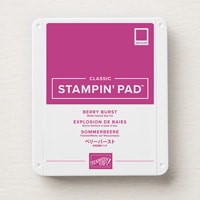
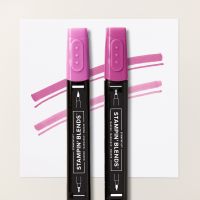
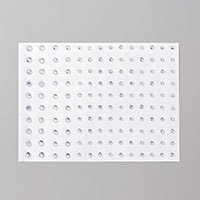
  • Finish with Rhinestones colored with Berry Burst Blend, and a bow of retired Berry Burst ribbon.
Product Listg

Friday, June 28, 2024

Summer Floral Layers Clean & Simple

 I'm lovin' the new InColors!  They are just so cheerful! I spotted a version of this card, and it is so much prettier in person.  I am lovin' the InColor Glimmer paper, and add a little bit whenever I can.  For this one, I replaced a Petunia Pop layer under the embossed White piece with a piece of Petunia Pop Glimmer paper!  Turned the card from just nice...to wow!!  You really need this Glimmer paper!! My ladies at the Senior Center did this one, too, and they just LOVED the colors!  You have to give this one a try...we will in my class next month, for sure!


Measurements:  

  • Summer Splash (N): 1/2 sheet
  • Basic White: 2" x 4 1/2", 4" x 5 1/4" (inside), scraps
  • Petunia Pop (N): 3 1/2" square
  • 2024 InColor Glimmer Paper (N): 2 1/4" x 4 3/4" (Petunia Pop)
  • Unbounded Beauty DSP (N): 3 1/4" square, 1/2" x 5 1/4" (floral)
To Make This Card:

  • Run White strip through "diamond" Fun Patterns Embossing Folders found in the Online Exclusive Store.
  • Adhere to the Glimmer paper, and then to the left side of the folded Summer Splash card.
  • Attach DSP to the Petunia Pop square. Set aside.
  • Die cut scallop oval from the Unbounded Love Dies.  Stamp sentiment in the center with Petunia Pop ink.
  • Attach oval to the square with Dimensionals.
  • Then, attach the square to the card front, as shown, with Dimensionals.
  • Add White piece and strip of DSP to the inside of card.
  • To finish the card, add a knot of Petunia Pop ribbon, and scattered Shimmer Gems.

Product List