So, here is the version from Susan Campfield (with my own touches), This is the one that we will be doing in class this month! It uses the FREE SAB Bloom Impressions DSP, which has MANY color options to choose from! I also used one of the small butterfly dies and sentiment from the Sketched Butterflies in the Annual Catalog.


Measurements:
- Basic White: 1/2 sheet, 3" x 10 5/8", 2 pcs @ 1" x 2 3/4", scrap
- Melon Mambo: scrap
- Bloom Impressions (N(SAB)): 4 1/8" x 5 3/8" (inside), 2 pcs @ 2" x 5 3/8" (front flaps), 2 pcs @ 2" x 2 3/4" (White floral); 2 pcs @ 2" x 5 3/8" (inside flaps), 1/2" x 1 2" (Dark pink mini flowers); 2 pcs @ 2" x 2 3/4" (Light pink mini flowers - flip side of dark)
To Make This Card:
- The base of this card is a "gate" fold. Take the 1/2 sheet of White and score at 2 1/8" from one end. Then, take the other side and match cut edges and crease, creating a "gate" fold.
- To this, adhere the White Floral Print to the 2 front flaps.
- At this point, you are going to make and attach the 2 "strips" that will hold the "accordion" piece to the card base.
- Take the 2, 1" pieces and score lengthwise @ 1/2". Crease Well.
- Place Tear n Tape on both sides. Remove backing of one side, and adhere to the inside of a flap, lining up fold to cut edge. Repeat for the other side.
- Now, you can attach the large White Floral piece to the inside, and Pink floral print (either side) to the 2 flaps on either side, over the "extensions". Set aside.
- Now, for the "accordion" piece. Score at 2 1/8"- 4 1/4"-6 3/8"-8 1/2", across the piece.
- To fold, start at the left side and make a "mountain" fold, a "valley" fold, another "valley" fold, and end with a "mountain" fold. Crease well with a bone folder. Fold up so it all lays on top of each other. (You might need trim, re-crease to make it lay flat. And, try creasing both ways, as one might work better than the other!) Your card can open either way.
- Arrange the 4 - 2" x 2 3/4" DSP pieces onto the Accordion panels, in any order desired, leaving the center panel free for your sentiment.
- Stamp the sentiment of your choice in black, and add a small strip of DSP to the bottom.
- Now, your ready to insert the "accordion" piece!
- Place Tear n Tape on the wrong side of the center section, the one with the sentiment.
- Open the card base, and center and adhere to the inside on the large White Floral DSP. Press well.
- Now, for the 2 outside panels/tabs. Take one of the "tabs" and lay out flat, so it looks like an extension of the front flap. Remove the tape backing, and fold the panel into place. Repeat for the other side. Voila! It is done!
- Die cut a single "butterfly" from Melon Mambo cardstock. Shape and add to "front" panel with Mini Glue Dots. I also added a bit of sparkle with Wink of Stella.
- Die cut small label from Countryside Corners Dies in White cardstock.
- Stamp small sentiment onto label. Attach to front panel with Mini Stampin' Dimensionals.
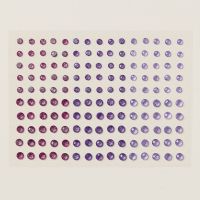
- Finish with scattered Purple SAB Sequins - in pink.


![Sketched Butterflies Bundle (English) [ 163492 ]](https://assets1.tamsnetwork.com/images/EC042017NF/163492s.jpg "Sketched Butterflies Bundle (English) [ 163492 ]")
![Bloom Impressions 12" X 12" (30.5 X 30.5 Cm) Designer Series Paper [ 164944 ]](https://assets1.tamsnetwork.com/images/EC042017NF/164944s.jpg "Bloom Impressions 12\" X 12\" (30.5 X 30.5 Cm) Designer Series Paper [ 164944 ]")
![Daffodil Delight 8-1/2" X 11" Cardstock [ 119683 ]](https://assets1.tamsnetwork.com/images/EC042017NF/119683s.jpg "Daffodil Delight 8-1/2\" X 11\" Cardstock [ 119683 ]")
![Calypso Coral 8-1/2" X 11" Cardstock [ 122925 ]](https://assets1.tamsnetwork.com/images/EC042017NF/122925s.jpg "Calypso Coral 8-1/2\" X 11\" Cardstock [ 122925 ]")
![Basic White 8 1/2" X 11" Cardstock [ 166780 ]](https://assets1.tamsnetwork.com/images/EC042017NF/166780s.jpg "Basic White 8 1/2\" X 11\" Cardstock [ 166780 ]")
![Calypso Coral Classic Stampin' Pad [ 147101 ]](https://assets1.tamsnetwork.com/images/EC042017NF/147101s.jpg "Calypso Coral Classic Stampin' Pad [ 147101 ]")
![Small Blending Brushes [ 160518 ]](https://assets1.tamsnetwork.com/images/EC042017NF/160518s.jpg "Small Blending Brushes [ 160518 ]")
![Basics 3 D Embossing Folders [ 161598 ]](https://assets1.tamsnetwork.com/images/EC042017NF/161598s.jpg "Basics 3 D Embossing Folders [ 161598 ]")
![Stampin' Dimensionals [ 104430 ]](https://assets1.tamsnetwork.com/images/EC042017NF/104430s.jpg "Stampin' Dimensionals [ 104430 ]")
![Mini Glue Dots [ 103683 ]](https://assets1.tamsnetwork.com/images/EC042017NF/103683s.jpg "Mini Glue Dots [ 103683 ]")
![Iridescent Faceted Gems [ 163368 ]](https://assets1.tamsnetwork.com/images/EC042017NF/163368s.jpg "Iridescent Faceted Gems [ 163368 ]")
![Neutrals Adhesive Backed Sequins [ 161627 ]](https://assets1.tamsnetwork.com/images/EC042017NF/161627s.jpg "Neutrals Adhesive Backed Sequins [ 161627 ]")