I saw a version of this card and thought it would be PERFECT for my class I had last month in Springfield, as it showcased some new products!! They loved it, and I do, too! We'll have to do it in my class, here! It uses a piece of diagonal-cut piece of cardstock, some coordinating birthday-themed stamps from several sets, and highlights a new punch!
Measurements:
- Basic Black: full sheet cut in half DIAGONALLY
- Basic White: 4" x 5 1/4" (cut diagonally into 2 pieces, you'll need only 1), scraps
- Sweet Sorbet (N): 2 1/2" x 8 1/2" strip
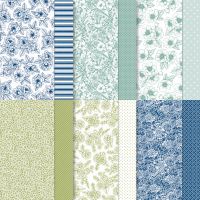
- Bee Mine Valentine DSP: 4" x 5 1/4" (small hearts), 1/2" x 4" strip
To Make This Card:
- Cut full sheet of cardstock in half Diagonally. (this design makes 2 cards).
- You can fold by either folding points into place an creasing with a bone folder, or you can place into a paper trimmer or score board and score the lines at 4 1/4" and 5 1/2" and then creasing with bone folder.
- Attach White quarter to inside of card, as well as the strip of DSP.
- Run White diagonal piece through "cross hatch" embossing folder, from the Basics 3D embossing folder in the Online Exclusive Store. Be aware of which side of the piece you are embossing. Attach to corresponding front.
- Next, cut DSP at a diagonal as well. Double check which direction (diagonal) you need to cut this piece so it matches the cut on the card front.
- Now, attach DSP to correct diagonal piece. It will have a 1/16" -1/8" border. Note: be aware of any directional patterns! (I try to avoid them).
- Now, to decorate!
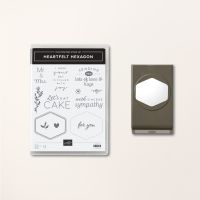
- Stamp 3 "hexagon borders" in Memento black onto strip of Sweet Sorbet cardstock. Punch out with corresponding, (new) punch!
- On one, stamp the sentiment from the Heartfelt Hexagon stamp set in Memento Black.
- For the other two, I stamped the "bunny" from the Fluffiest Friends (Online Exclusive) and "cupcake" from the Circle Sayings in the Annual Catalog.
- Color as shown with Blends.
- The "bunny" can be die cut, the "cupcake" you will need to fussy cut.
- I attached both to a punched image with Dimensionals.
- Now,to attach to the card. I attached the first one to the top, so that the top point is even with the fold, and the outside edge even with the other fold. I repeated for the bottom piece with the "cupcake".
- The "words" should fit in between! (adjust if necessary)
- Open the top flap and lightly make a pencil mark showing the diagonal. This will guide you for the inside sentiment placement.
- Open up the other flap, and stamp sentiment in Memento Black. I also added 2 Sweet Sorbet hearts.
- Erase the pencil mark with the ink is dry.
- Finish with a little Wink of Stella on the images, and 3 Pearl Neutrals Sequins on the sentiment.